Sleazy's Garage Logo
Sleazy's Garage

1989 Mustang GT

Restomod and Coyote Swap

Project Name: ???

74%

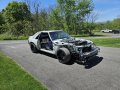
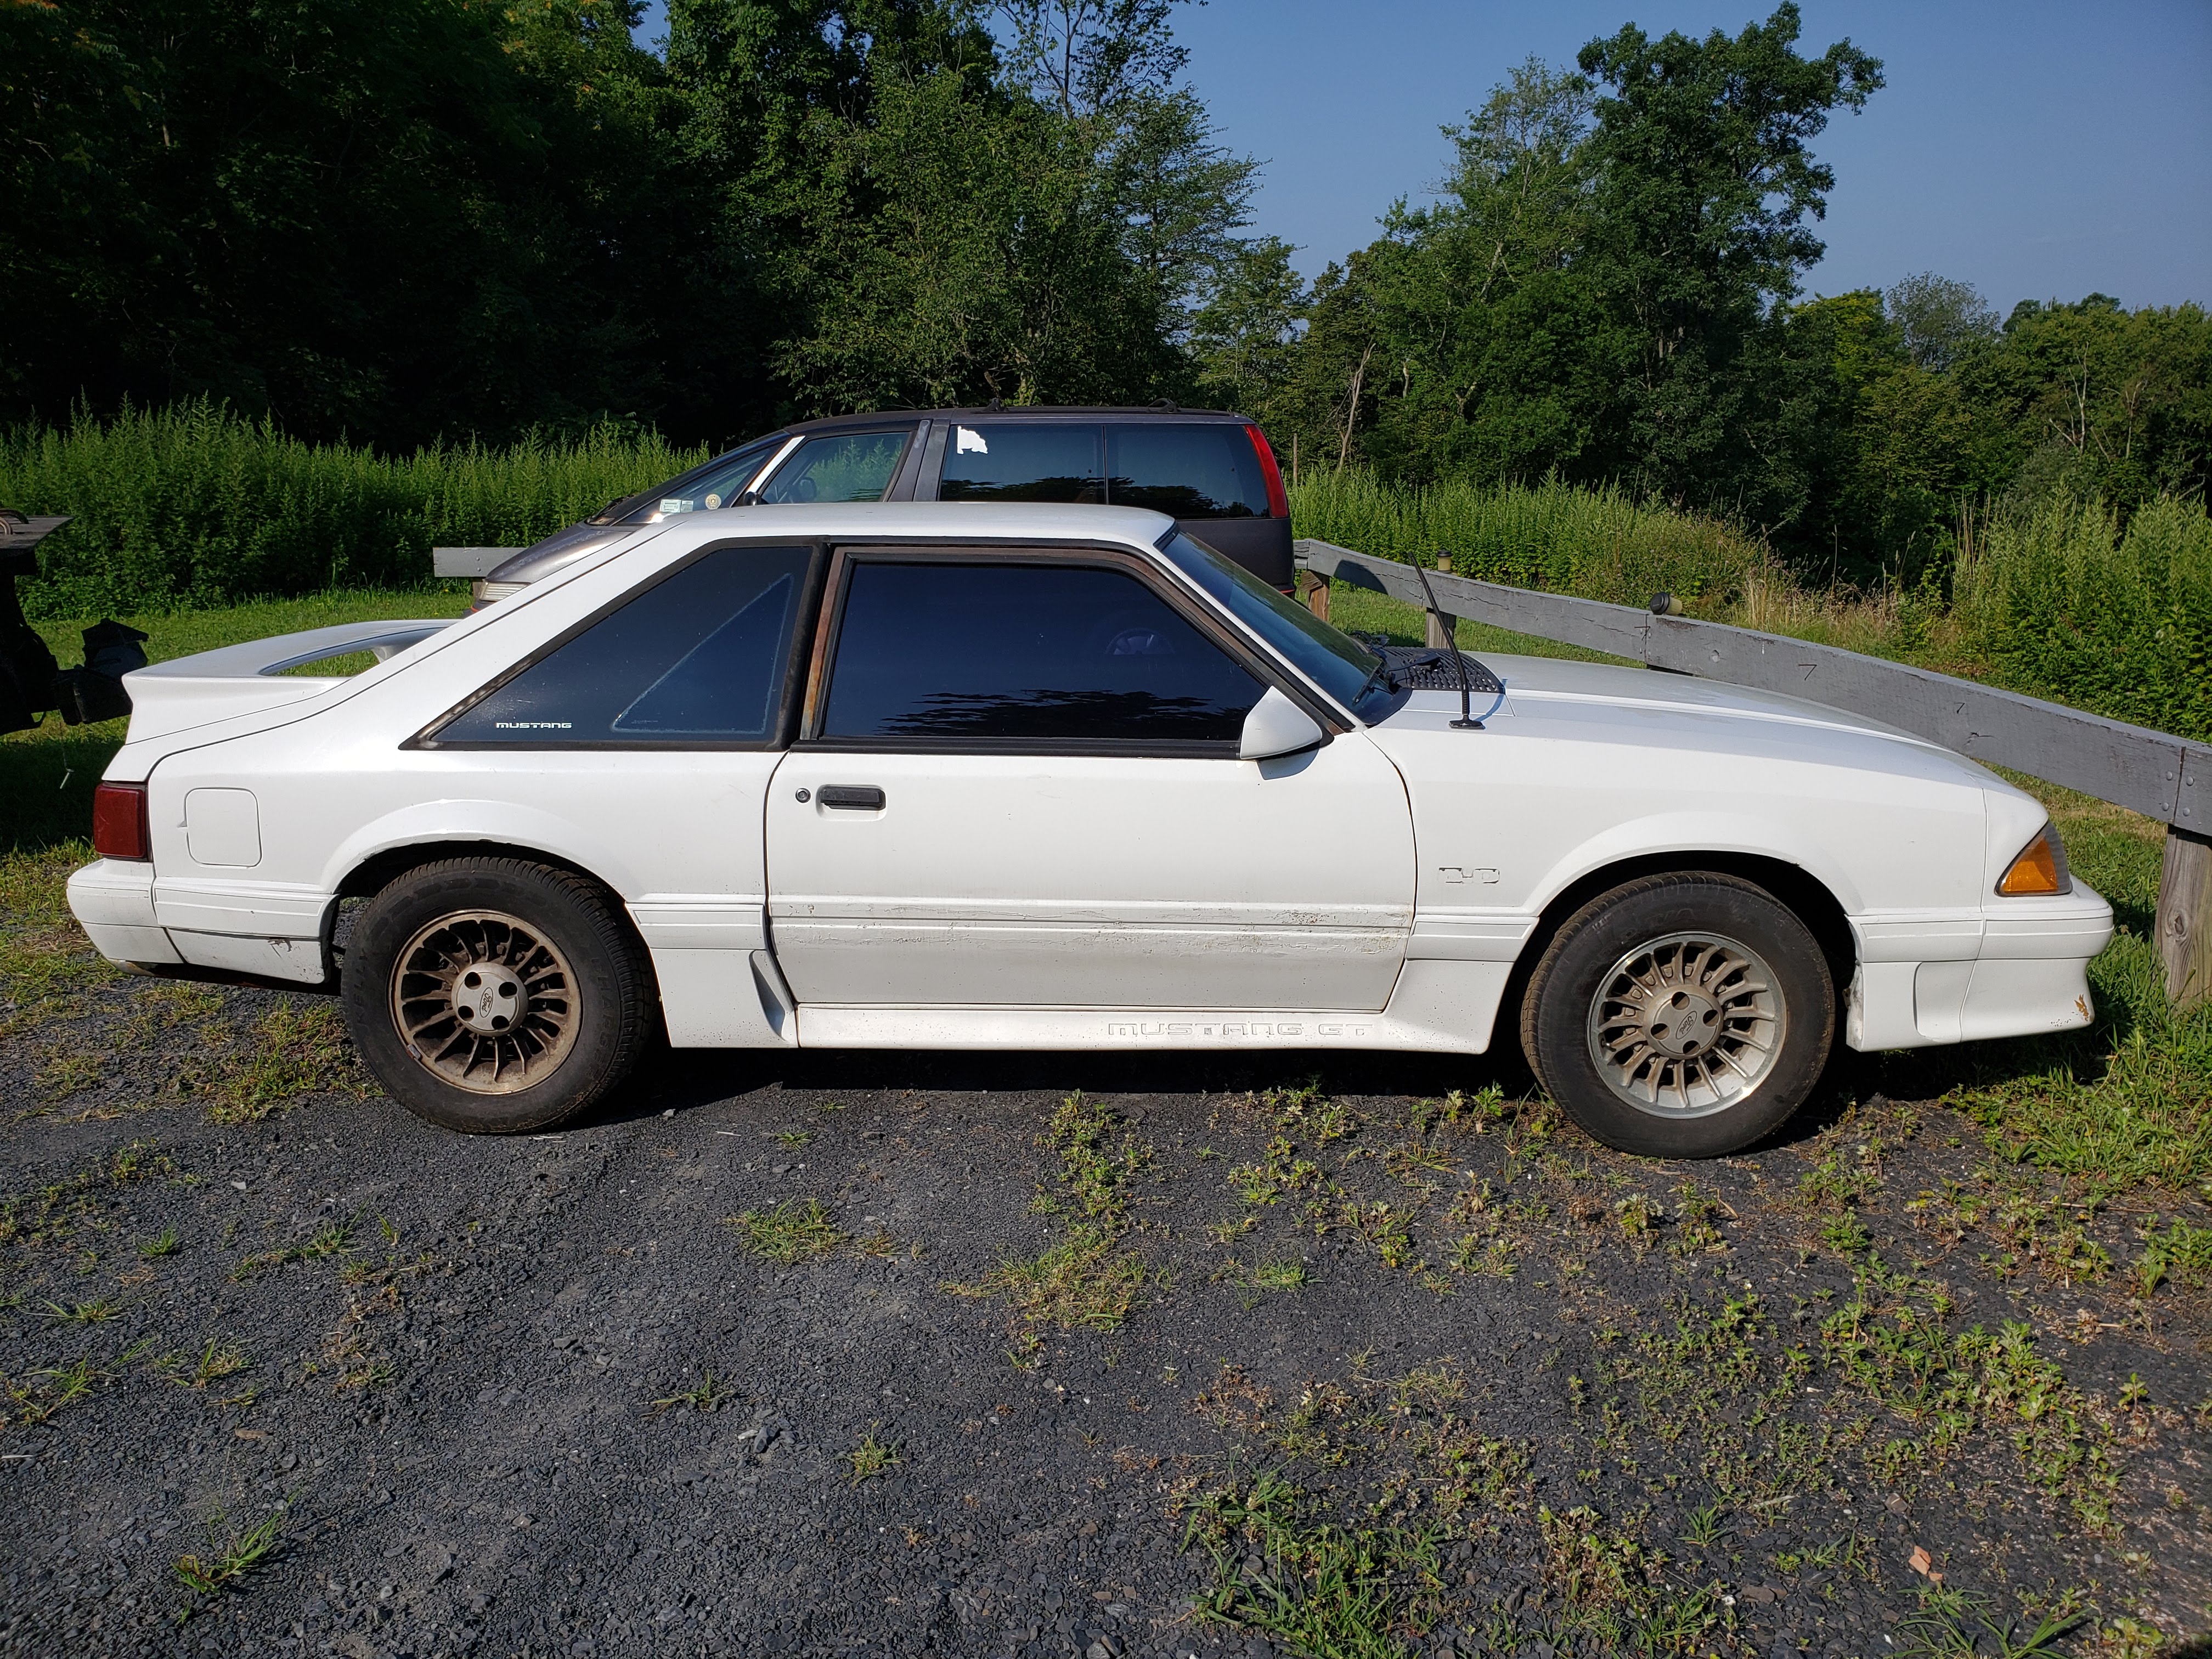
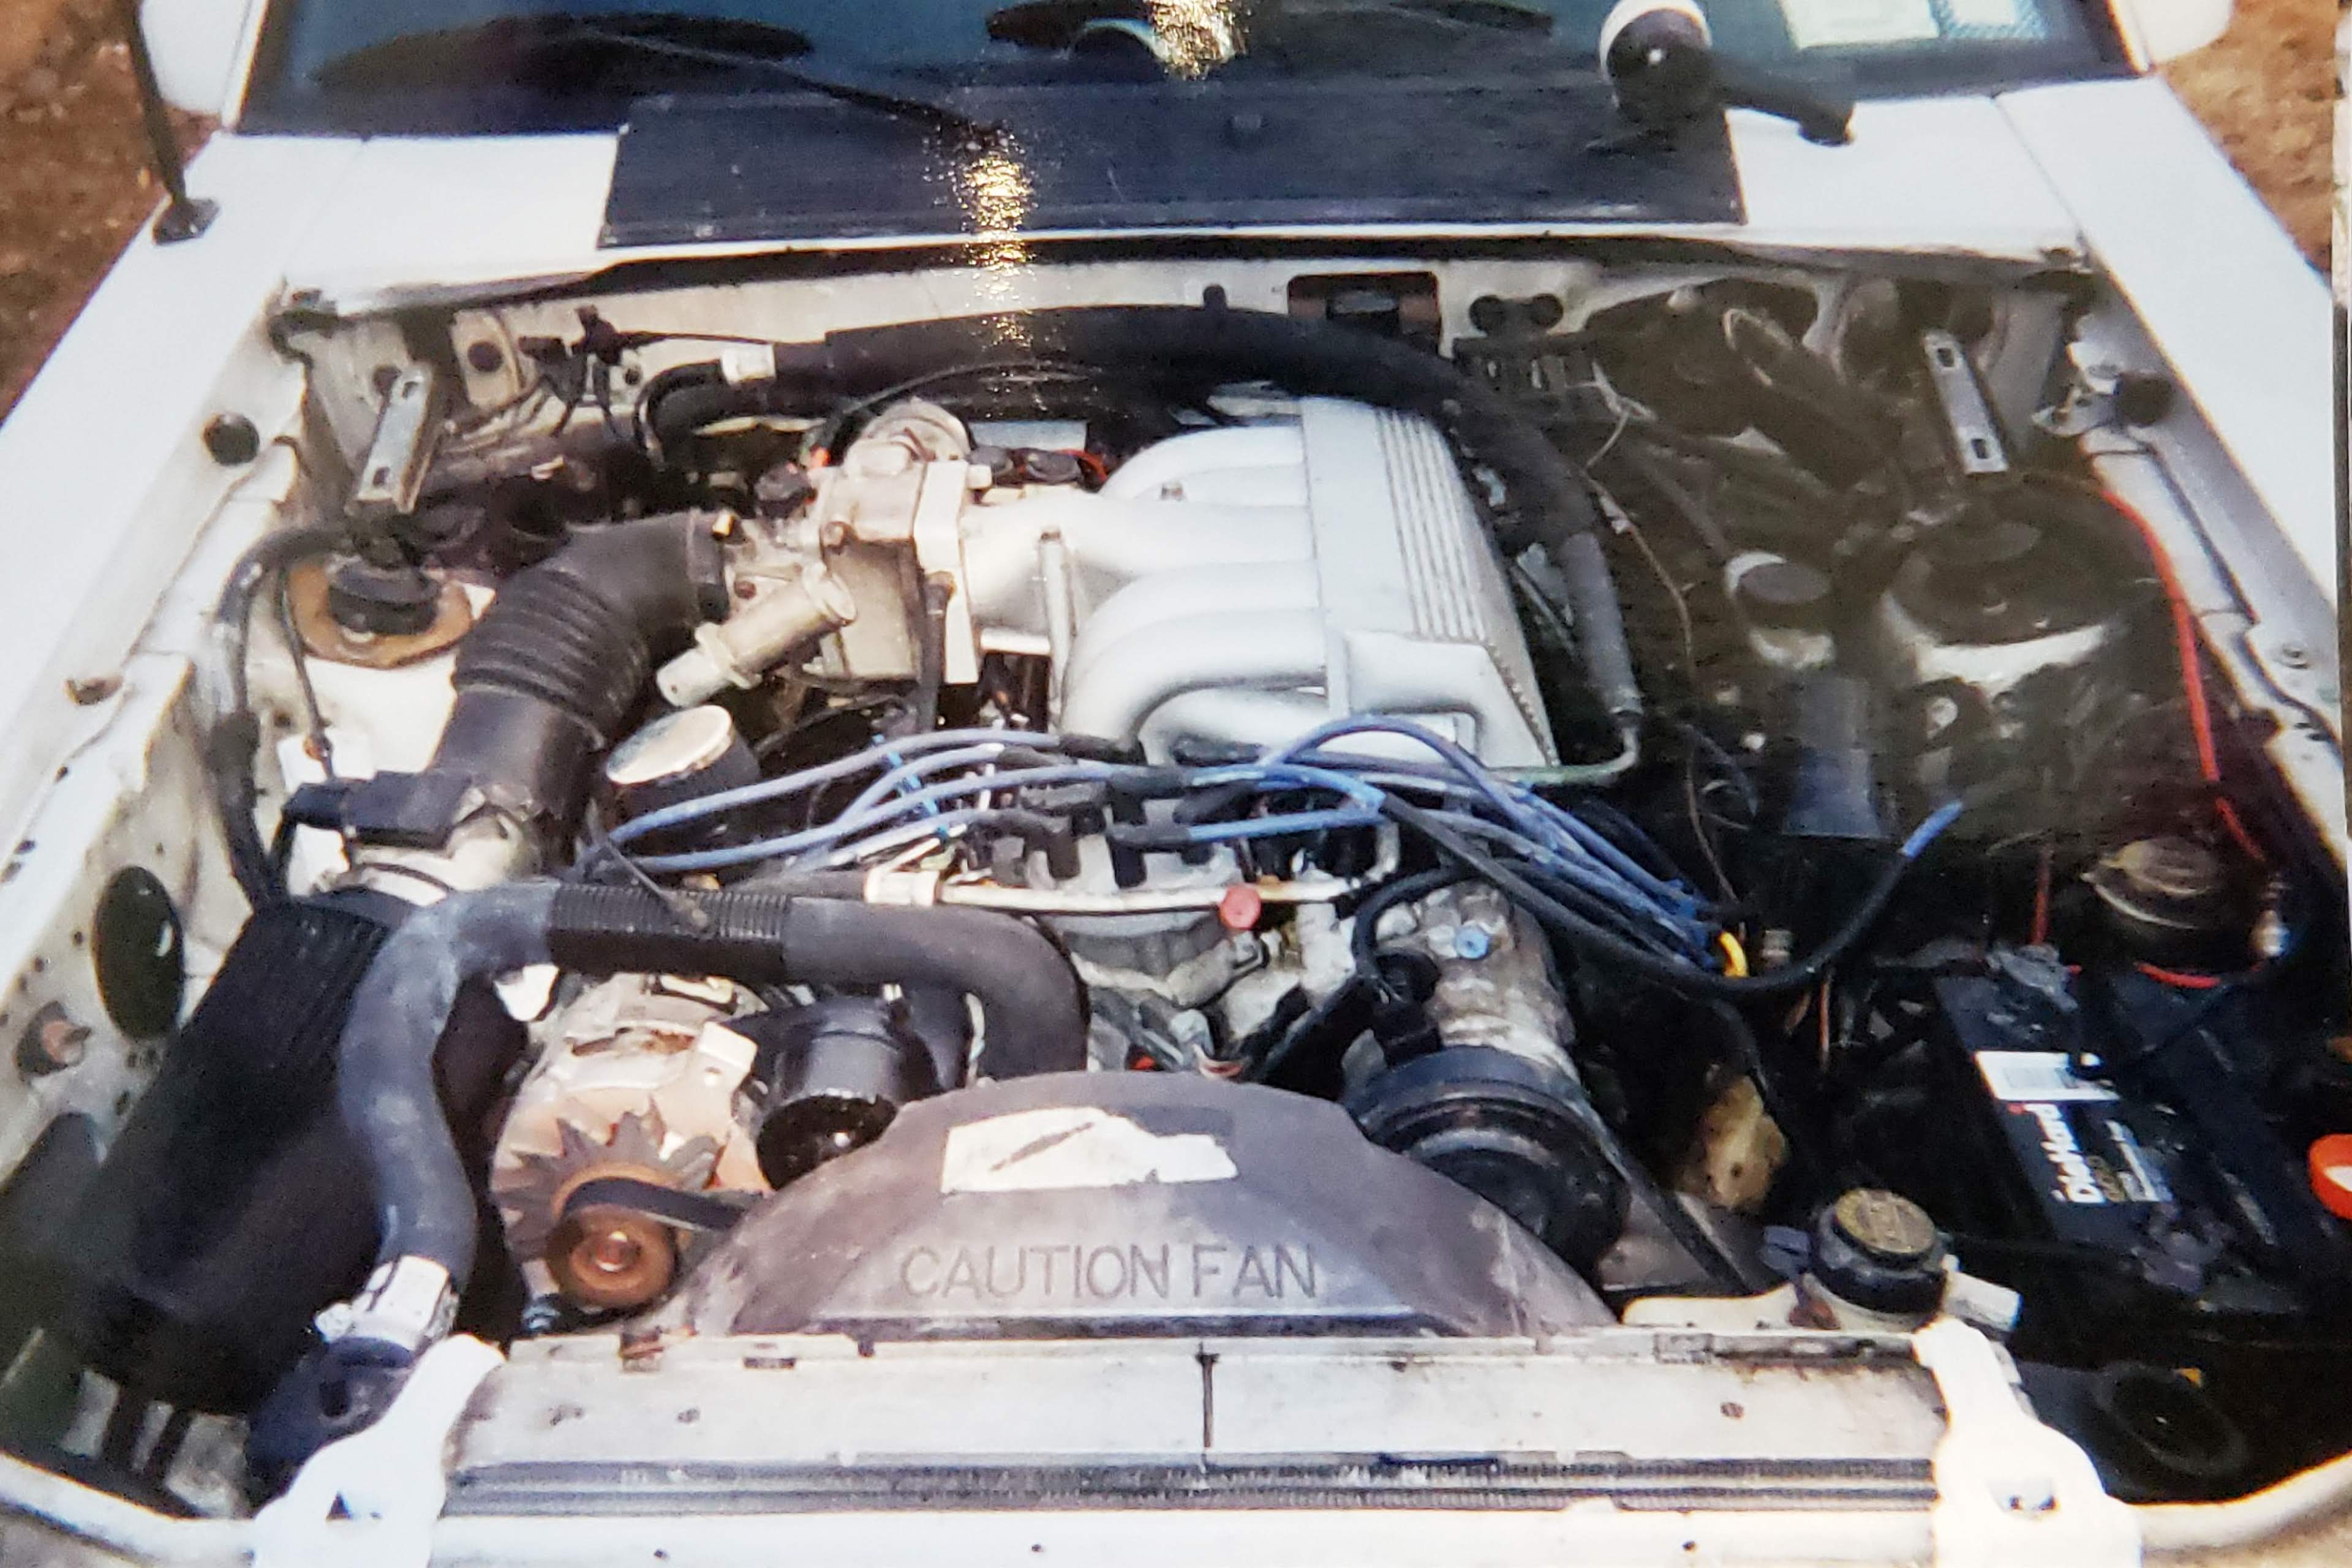
This is my 1989 Mustang GT that I bought in 1998 when I was still in high school. This is the car that I cut my teeth on automotive work on. After learning as much as I could about fox body Mustangs, I caught the modification bug.

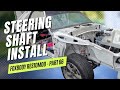
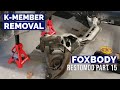
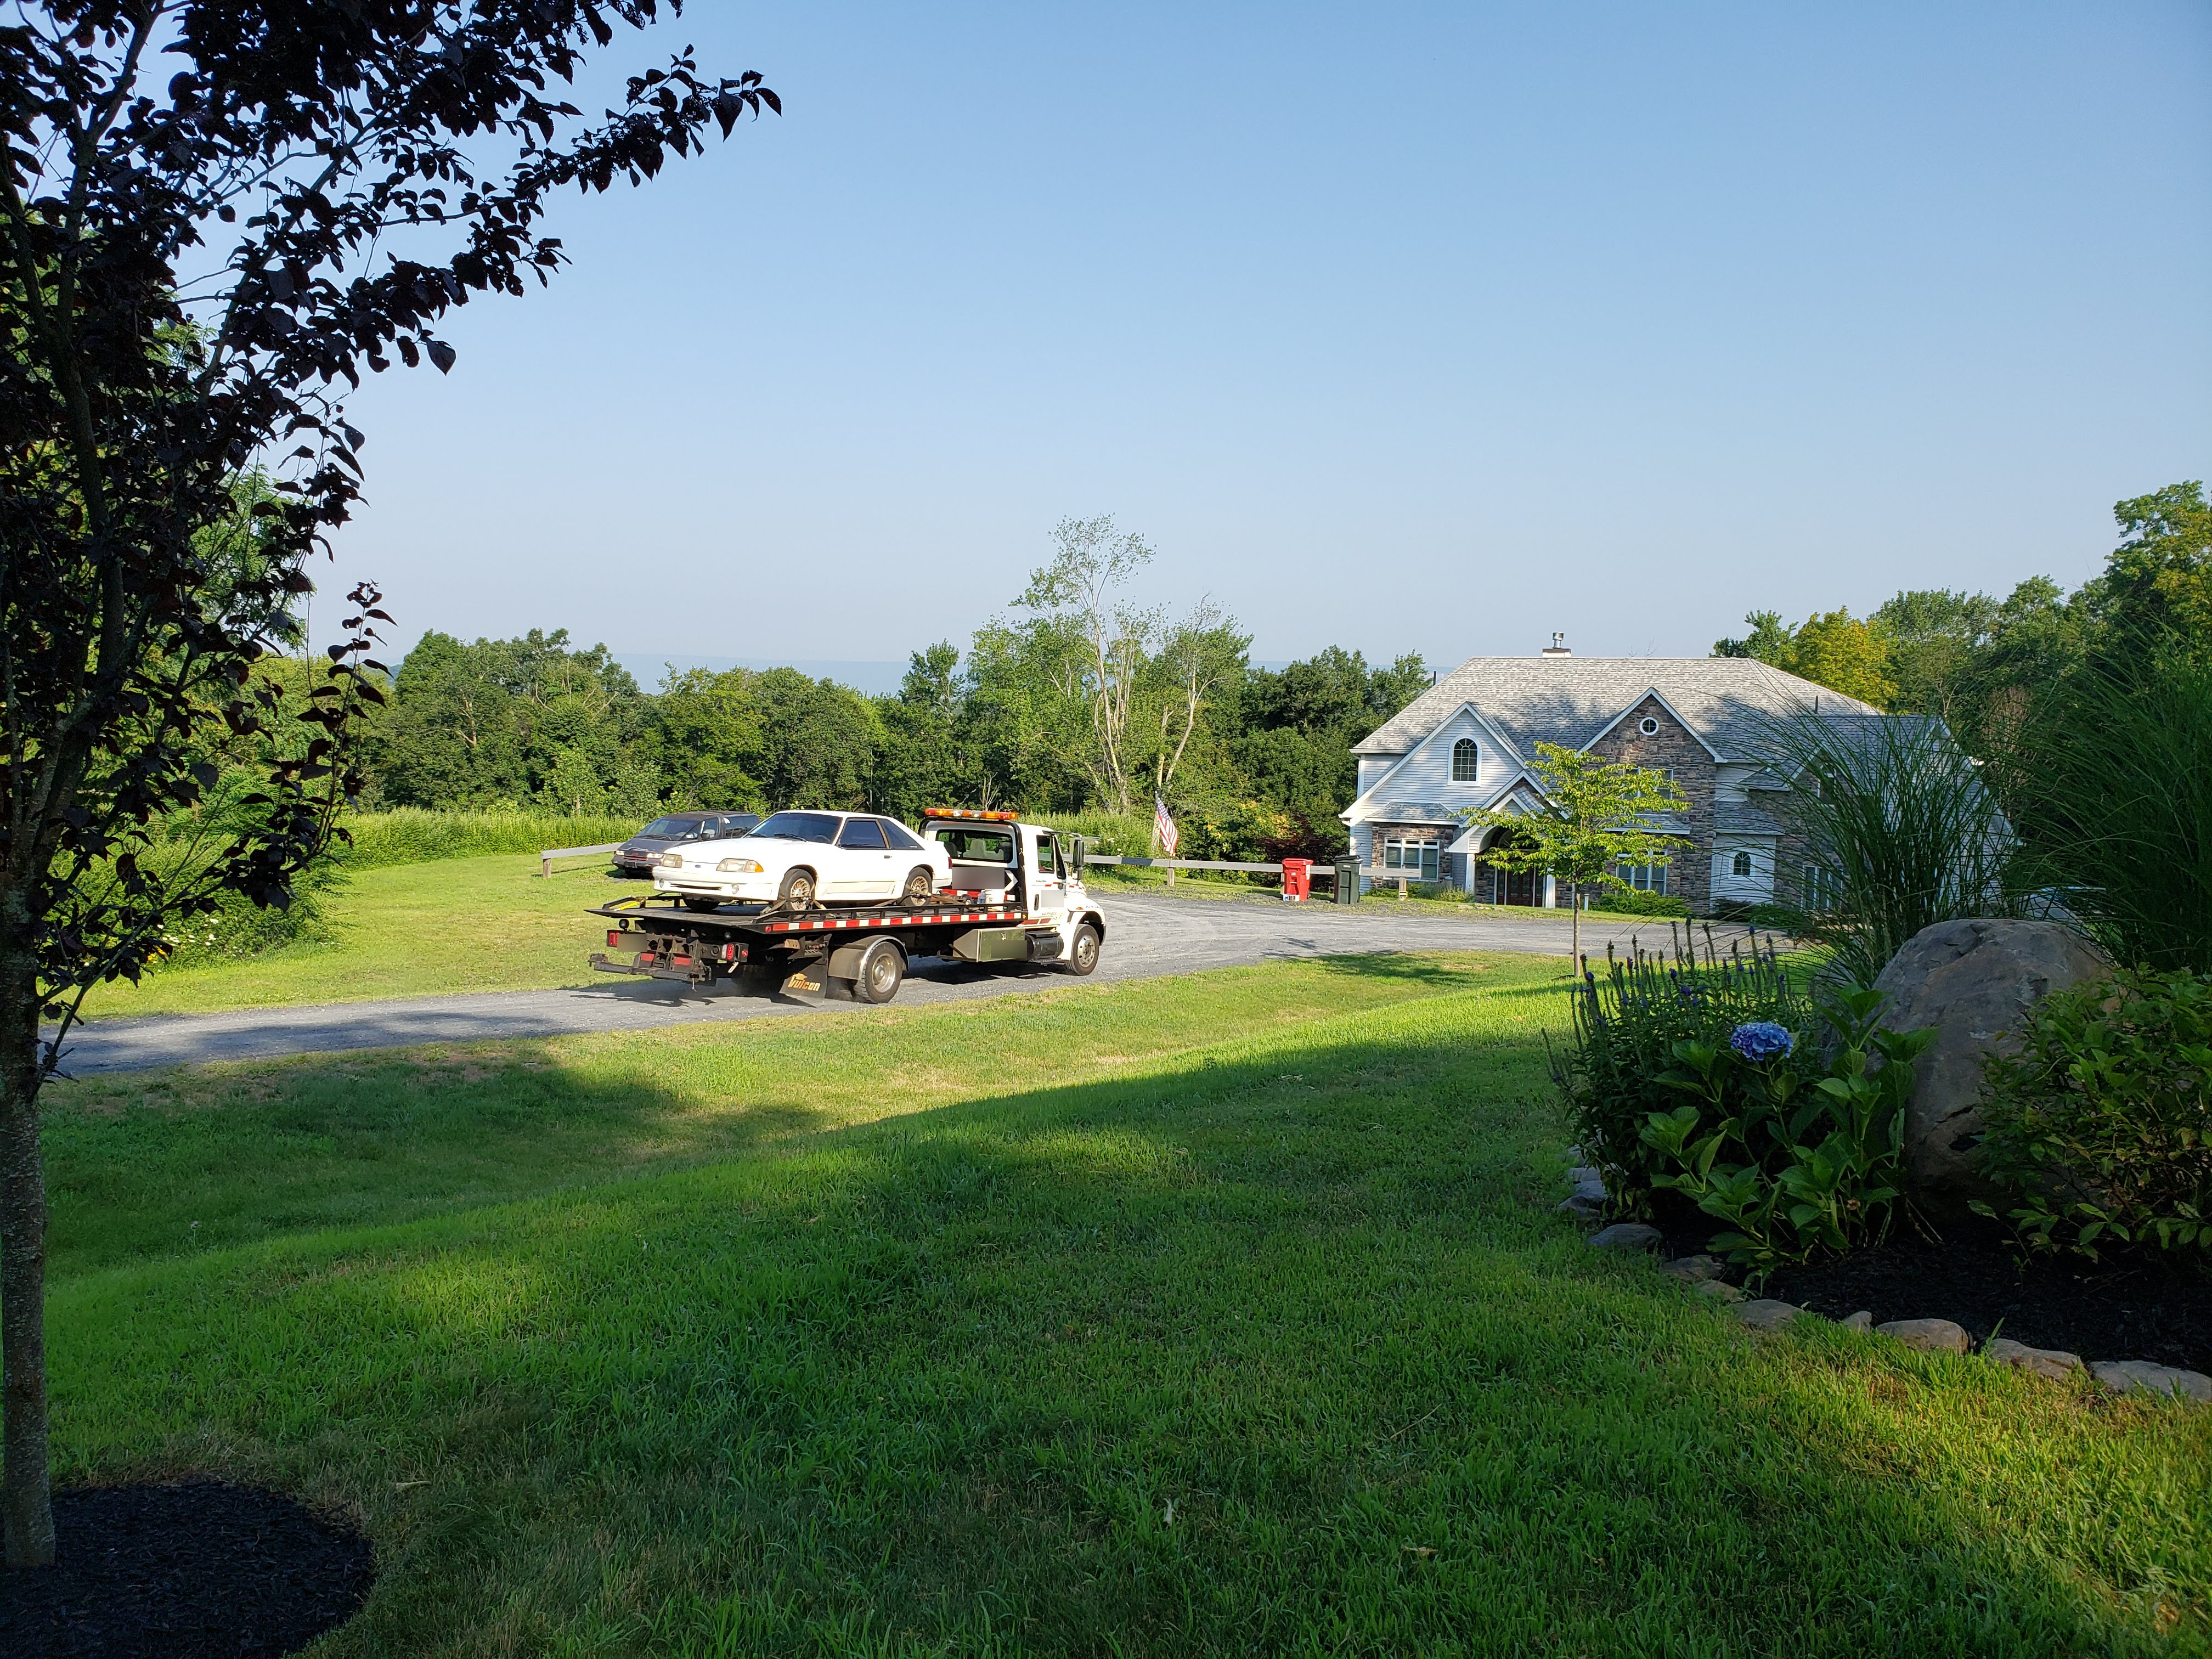
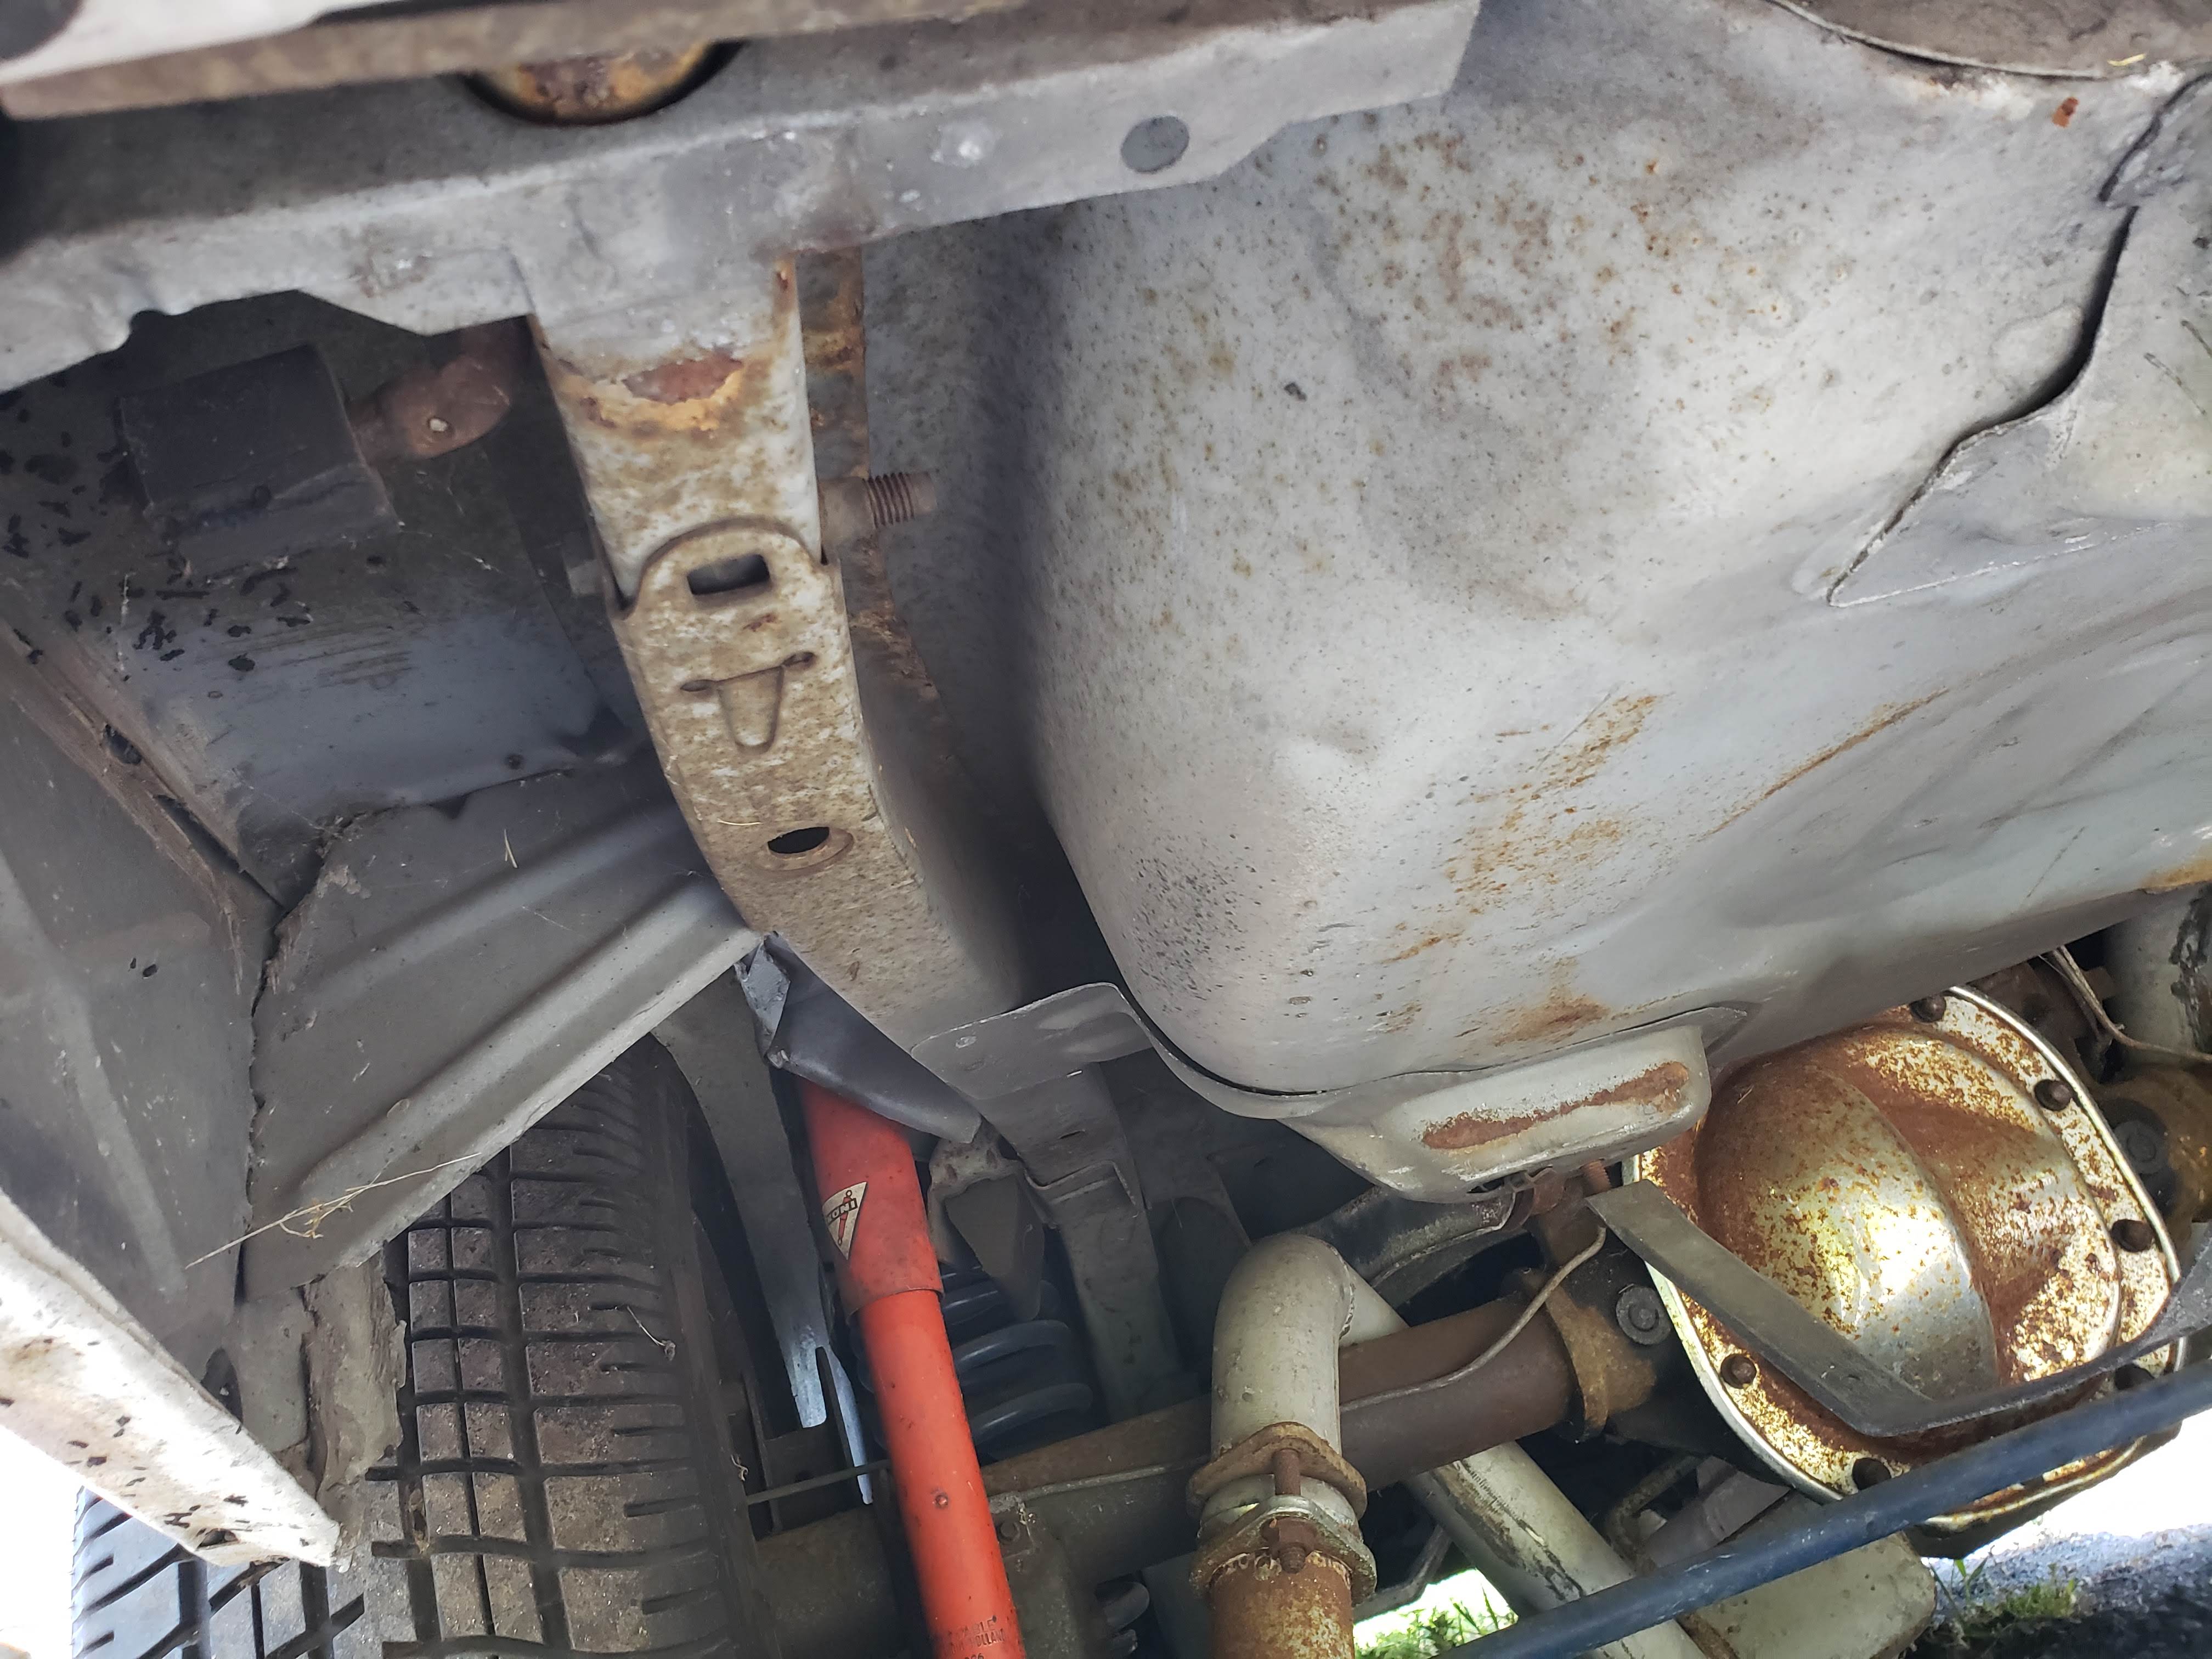
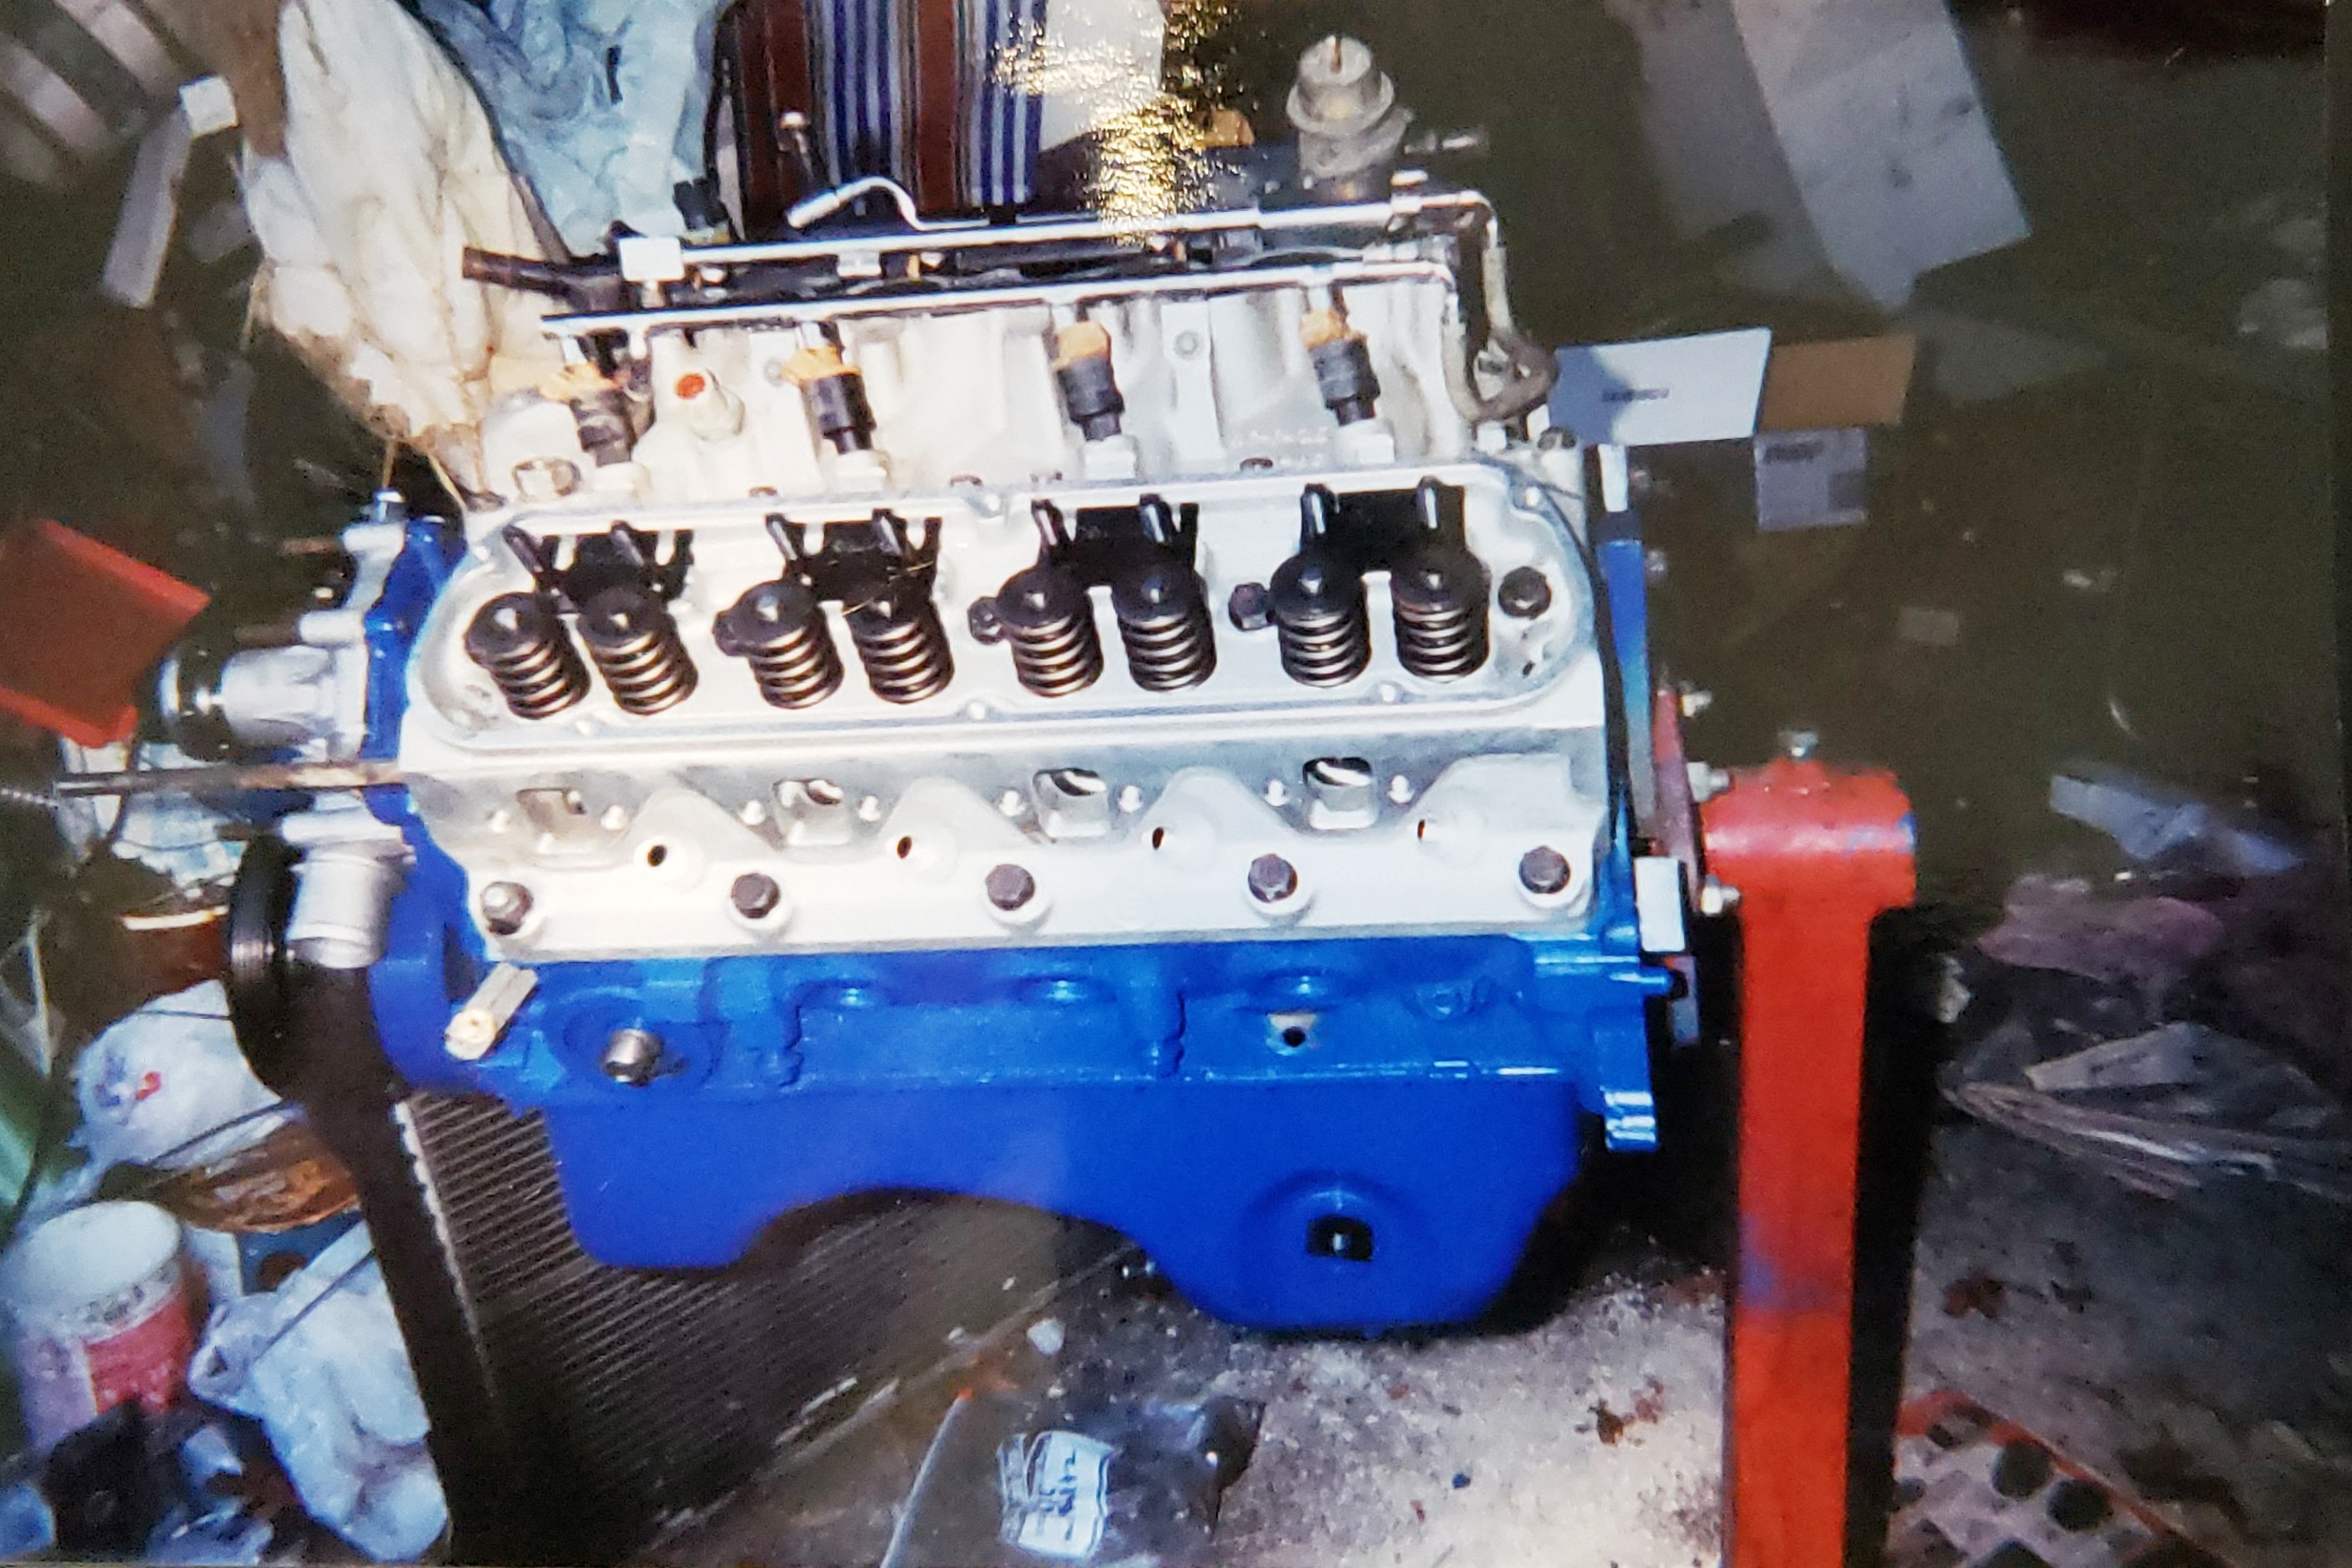
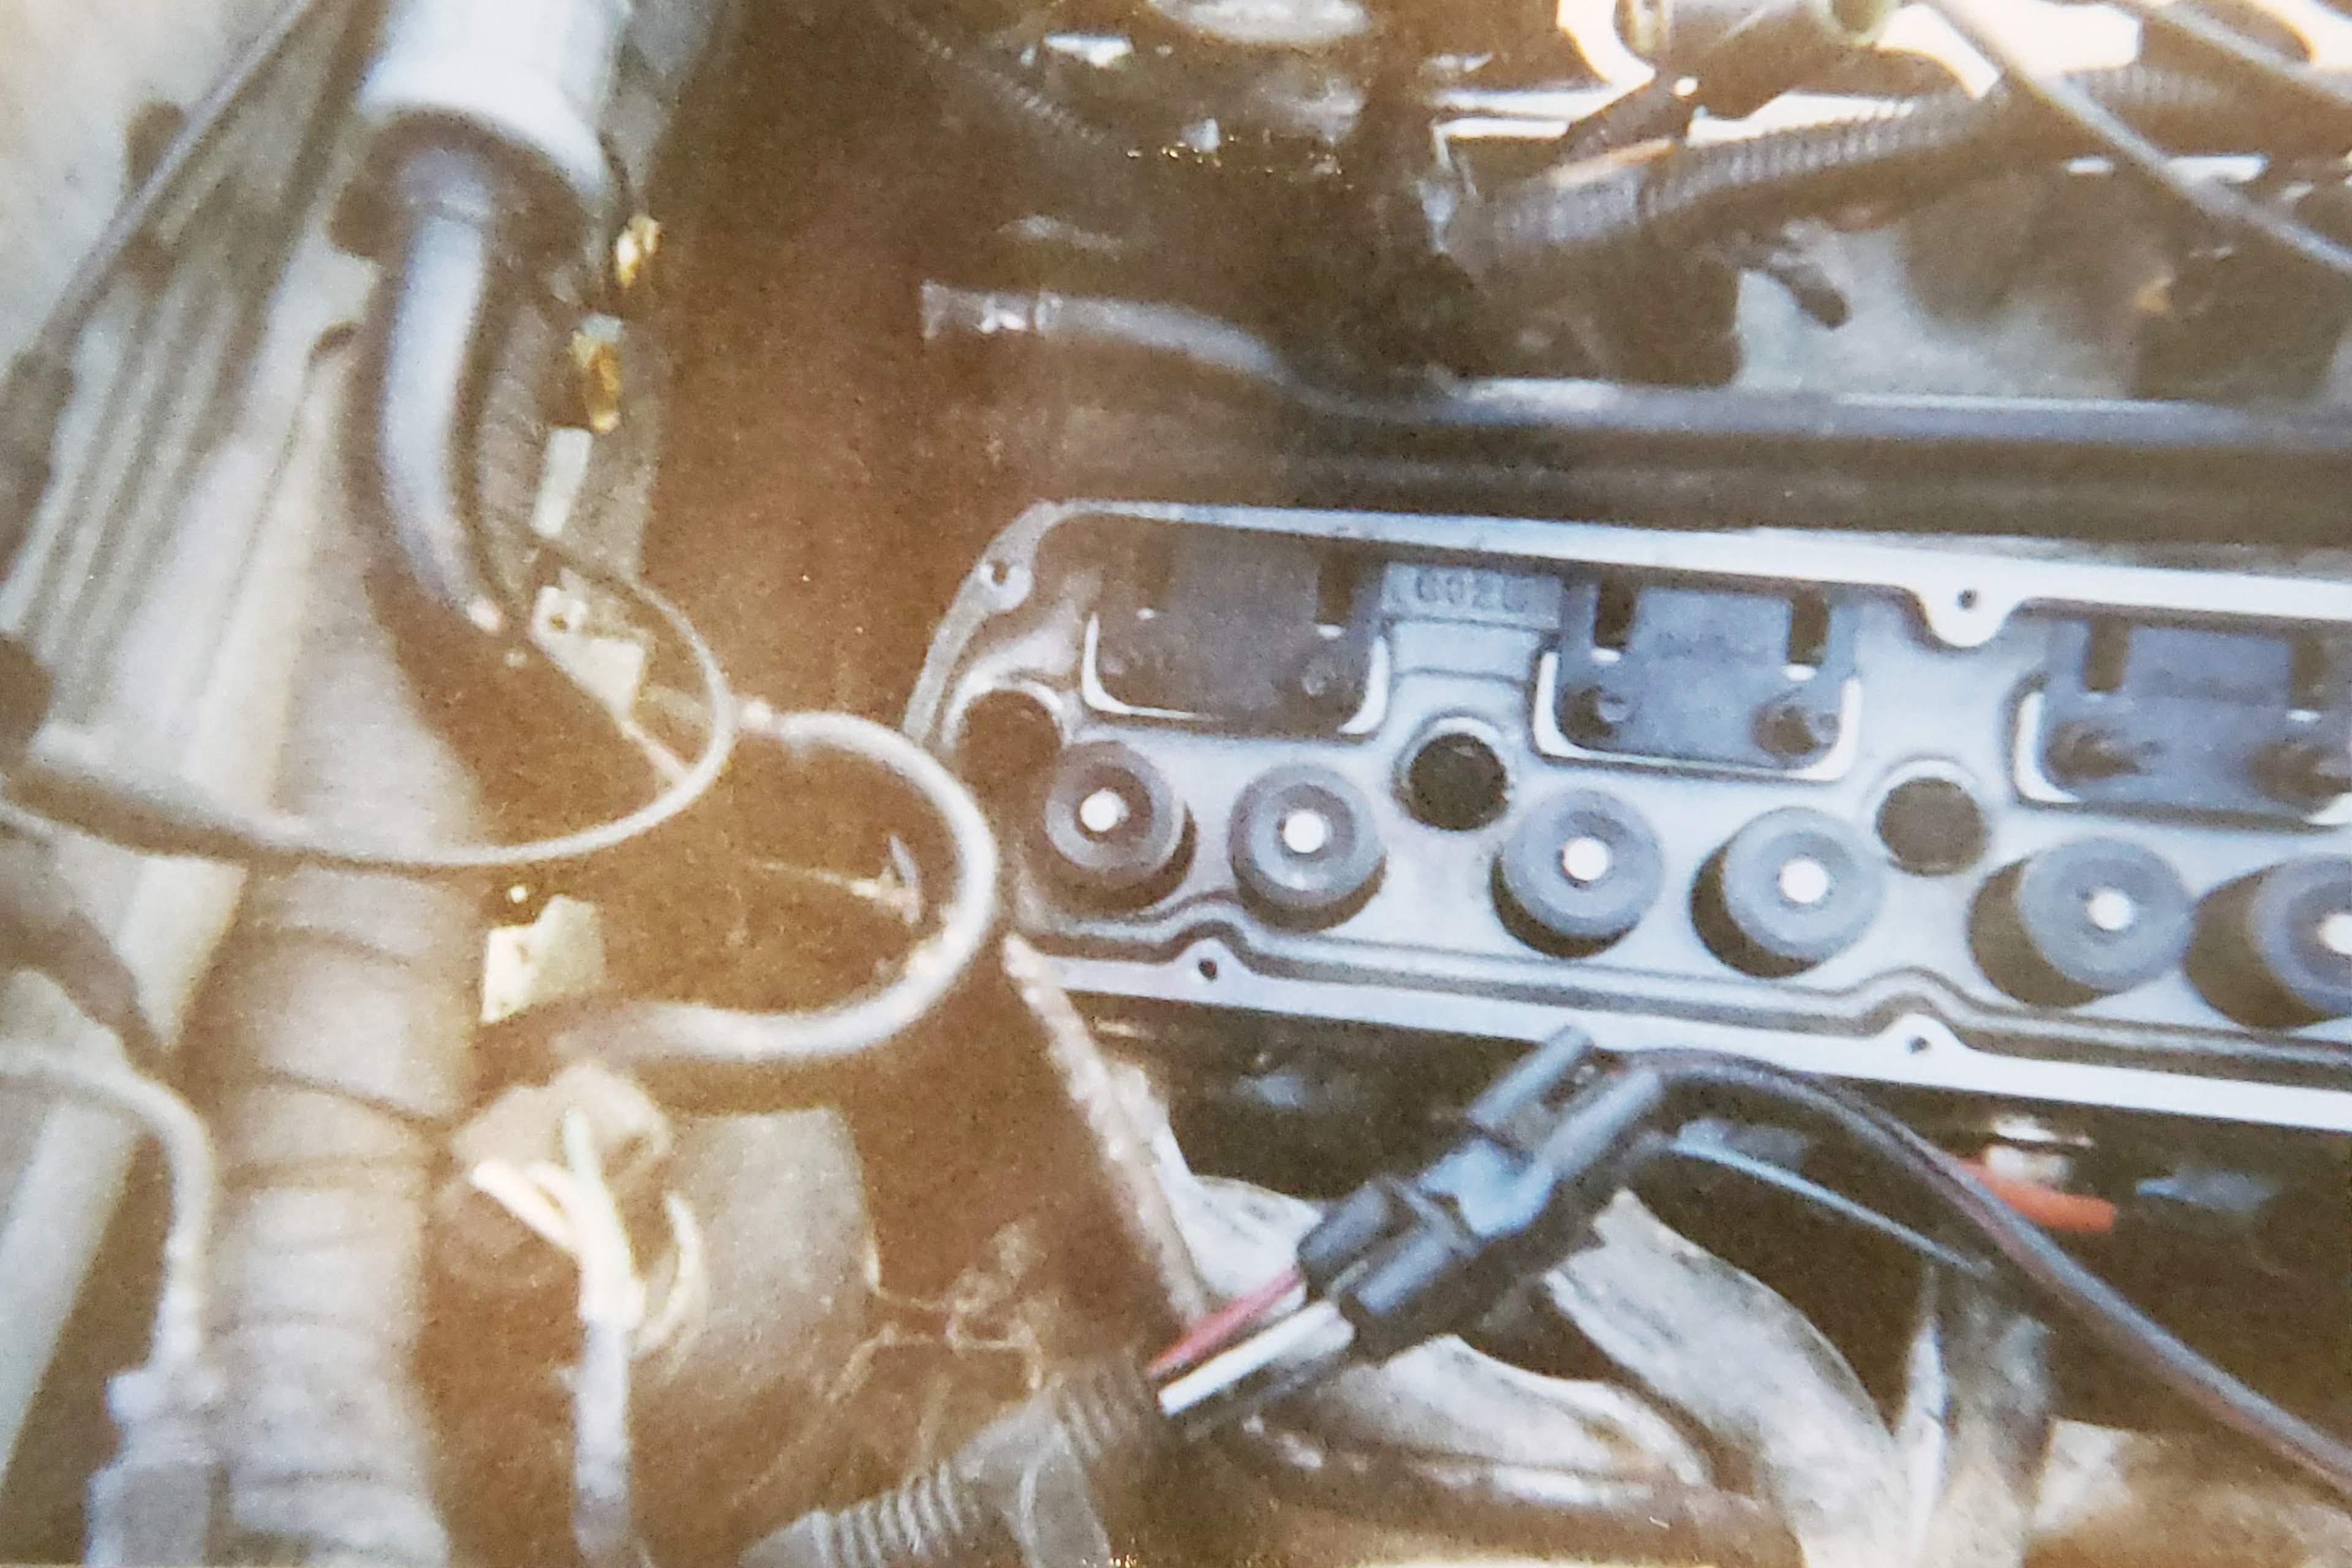
I had it towed up to my house from my parent's garage where it sat since I parted out the engine and I've started a restomod project where I intend to coyote swap it and upgrade just about the entire thing.

Project Timeline

Jump to year 2025202420232022202120192001200019991998
2025
Image of Installing the radiator and cooling fans on my Foxbody coyote swap May 18th
Cooling System Install - Foxbody Restomod Part 111 - Installing the SVE radiator, SVE cooling fans, SVE overflow tank, SVE radiator hold down bracket, Power by the Hour coyote swap fan relay, heater hoses, running all the wires, and building all the harnesses required to ensure my fox body coyote swap keeps its cool. We did stop short of putting the upper and lower rad hoses because I bought the one for the KRC power steering pump but I changed my mind and will be using the PBH speed drive system instead. (12 days ago) Watch Now
Image of Clean coyote swap wiring... again... These cables are thicc! May 4th
Permanent Coyote Wiring Part 5 - Foxbody Restomod Part 110 - Alright, lets finish up the "permanent" wiring videos for a bit with this one. We're putting the 0-gauge wiring up to the PDB, making some loomed harnesses, and re-installing the starter motor with a powerbythehour shim. (25 days ago) Watch Now
Image of Wiring vids are boring, right? But I'm starting to enjoy it... 😅 April 27th
Permanent Coyote Wiring - Foxbody Restomod Part 109 - I know wiring videos are boring, and this one is cut short in a weird place, but this is documentation and it's a part of the project. There is some sneak peeks at the end product though... I really appreciate you folks sticking with me! (33 days ago) Watch Now
Image of Foxbody coyote swap QuickTime bellhousing install April 13th
Bellhousing Installation - Foxbody Restomod Part 108 - Alright let's get this dang albatross off of our neck! Today we're installing the T-56 bellhousing without dropping the engine in our coyote swapped foxbody mustang. We have to loosen the headers and the motor mount bolts a little but you absolutely can do it without lowering the engine out. (47 days ago) Watch Now
Image of Clutching Pearls: Installing The Clutch in My Foxbody Coyote Swap March 23rd
Installing the Clutch - Foxbody Restomod Part 107 - Welcome back to my restomod documentation! In this video we're finally putting the clutch in and making another attempt at squeezing the bell housing/scattershield in. This video was filmed over the first three months of this year. It's been rough but garage time is when we get to decompress. Let's try to get over the hump of this project! (68 days ago) Watch Now
Image of How-To: Wiring a Coyote to Stock Foxbody Gauges March 8th
Connecting a Coyote to Stock Foxbody Gauges - Foxbody Restomod Part 106 - All the steps required to wire up a gen 2 coyote swap to your stock fox body dashboard gauges. Specifically the oil pressure, coolant temperature, and stock tachometer. If you can't afford Dakota digital gauges, like me, this is a really easy solution for you. (83 days ago) Watch Now
Image of Intermediate Coyote Wiring Harness Build and Clutch Reveal February 9th
Permanent Coyote Wiring Part 3 - Foxbody Restomod Part 105 - In this video, we're completing the creation of what I'm calling the intermediate PCM harness. It's the harness that connects the vehicle's ignition and fuel pump wiring to the PCM. I bought some harness ends and had a bit of trouble working with them. I attempted a quick test fire to also test the bulkhead connector and that the accelerator pedal worked but had some complications. Let me know what you think of this clutch kit too! (110 days ago) Watch Now
Image of Cleanly Wiring the Coyote in My Foxbody (Permanently) Part 2 January 26th
Permanent Coyote Wiring Part 2 - Foxbody Restomod Part 104 - Finally finished splicing this Deutsch bulkhead connector into my Coyote swap wiring harness, but was it worth it? The point was to be able to cleanly install the wiring inside the car while still being able to fully tuck it in the engine compartment later. The real test here will be if the engine starts afterwards and if the accelerator pedal works. It took me about 10 hours to do and it was a ton of work. (124 days ago) Watch Now
2024
Image of Coyote Swap Wiring: The Ultimate Permanent Installation Starts Now! December 30th
Permanent Coyote Wiring Part 1 - Foxbody Restomod Part 103 - Chopping up my expensive coyote wiring harness! - In this video I'm modifying my coyote engine harness to include a bulkhead that I can fit through the firewall. The hope is that we have a clean installation at the end but my nerves are a bit cooked from this. (151 days ago) Watch Now
Image of How I Fixed My Foxbody's Cobra-swapped Brakes October 20th
Filling Brake Lines - Foxbody Restomod Part 102 - Almost all of my brake fittings leaked 😢 can we fix it? - It's time, I've been dreading this. I just knew there were going to be leaks. Can we not only fix all of the leaks but build pedal pressure? Will we have 1 out of 3 pedals fully working by the end of this video? (222 days ago) Watch Now
Image of Fixing past mistakes that I put aside in my foxbody restomod October 7th
Paying Tech Debt Part 2 - Foxbody Restomod Part 101 - I messed some stuff up while working on this project. Big surprise, right? Anyway in this video I want to start getting closer to getting the brakes setup and tested for leaks. Before I do that I want to make sure I fix the messed up routing of the brake lines amongst some other things. (235 days ago) Watch Now
Image of Firing up the Junkyard Coyote in my Foxbody Restomod for the First Time September 29th
First Fire! - Foxbody Restomod Part 100 - Enough messing around, the time has finally come. Weeks, nay months, of preparation have led us to this moment. Will it start the first time we power up the PCM and turn the key? Will it turn my house into a structure fire? Lets find out! (243 days ago) Watch Now
Image of Prepping My Foxbody For its First Start in Over 20 Years September 22nd
Prepping for First Start Part 4 - Foxbody Restomod Part 99 - Lets test this fuel pump and make sure we have enough pressure to fire up the coyote. We went with a 340lph Aeromotive fuel pump and adjustable regulator setup with 6AN feed and return lines. It's time to fill up the tank for the first time in over 20 years and send some juice to the relay to see if we can make some pressure. (250 days ago) Watch Now
Image of Installing the Coyote Swap PCM in my Foxbody Restomod September 15th
Prepping for First Start Part 3 - Foxbody Restomod Part 98 - Installing the Ford Performance PCM kit for my coyote swap. Wiring this thing up is gonna be super easy! ... or is it? (257 days ago) Watch Now
Image of Installing the Starter Motor on My Coyote Swap: A Tough Challenge! September 8th
Prepping for First Start Part 2 - Foxbody Restomod Part 97 - In this video I installed the factory Coyote mini starter motor and wired it up. The order of operations is a bit screwed up on this coyote swap but I'm confident we can get to where we need to be. The oil leak persists and is still a problem though. (264 days ago) Watch Now
milestone
September 7th
First Fire!
We got the Gen 2 Coyote fired up for the first time! Not only is it the first time the car has had a running engine in like two decades but its the first time the engine started up in potentially four years. (265 days ago)
Image of Countdown to First Start: Prepping My Coyote Swap with Exhaust and Intake! September 1st
Prepping for First Start - Foxbody Restomod Part 96 - In this video I tightened the exhaust bolts and re-torqued the intake back down. I also prepped the fuel line connection to the engine, replaced the cracked T-hose and filled it up with engine oil. Hey we hit a new milestone, first oil leak in over 20 years! (271 days ago) Watch Now
Image of Dropping a Gen 2 Coyote 5.0 into my 89 Foxbody Restomod August 11th
Coyote Engine Install Part 3 - Foxbody Restomod Part 94 - Finally putting an engine in this car after over 20 years. Will it go as planned? Spoiler alert, yep. Went right in. We did have to figure a few things out like putting the driver's side header on first but otherwise the whole thing didn't take much time at all. Next step, first fire? (292 days ago) Watch Now
Image of Transforming My Coyote 5.0 with the Holley Foxbody Swap Oil Pan! August 4th
Coyote Engine Install Part 2 - Foxbody Restomod Part 93 - In this video we finalize the preparations for putting the junkyard coyote into the car. We installed a Holley fox body coyote swap oil pan with Moroso oil pan studs and took a peek at the clutch that came off. Next video will have the engine going into the car. Use an engine stand folks! (299 days ago) Watch Now
Image of Get Ready for the Coyote 5.0 Swap: IMRC Delete Adventure! July 28th
Coyote Engine Install Part 1 - Foxbody Restomod Part 92 - In this video we start preparing the junkyard engine to get installed. This entails taking the intake off and adding the IMRC delete kit to it. I also had to remove the remaining exhaust manifold and one of the motor mounts. Finally, we install the SVE motor lift plate. (306 days ago) Watch Now
milestone
July 27th
Gen 2 Coyote Engine Installed
This marks the first time the car has had an engine in it since the head gasket blew! (307 days ago)
Image of My restomod fox body just got its coyote engine! July 14th
Coyote! - Foxbody Restomod Part 91 - My wife managed to find a low mileage used Coyote 5.0 from a wrecked 2017 Mustang GT. Then my father-in-law and I drove down to scoop it up and now it's back here in the garage. In this video we'll take a peek in the cylinders, remove some cut up hoses, and document how the wiring harness is run and what sensors it connects to. We'll also catalog what parts we need to buy to get closer to installing it. (319 days ago) Watch Now
Image of Transforming the Ride: Coyote Parts Swap \u0026 Dash Rebuild! June 23rd
Dashboard Reinstallation Part 1 - Foxbody Restomod Part 90 - In this video I started installing the dashboard again. It'll be a bit before we completely install it but the frame can go in now and we can start testing stuff. It's also the first time the car ever (for as long as I've owned it) had a "rest" pedal. I also jumped out the neutral safety check in my transmission harness with a temporary bypass and painted those two annoying spots on the door. Don't do that, by the way, it's not safe! (341 days ago) Watch Now
Image of Revamping the Foxbody: Epic Door Latch Mechanism Rebuild! June 10th
Doors Part 5 - Foxbody Restomod Part 89 - I started putting the driver's door back together. The two biggest anxieties I had about getting the door back together were the linkages on the door latch and the run channel molding. I address them both in this video and have some limited success. (354 days ago) Watch Now
Image of My Project Car Gets Power For The First Time In Over 20 Years! May 26th
First Energizing - Foxbody Restomod Part 88 - The last time this car had a battery in it and electrons flowing through the chassis harness, the iPod wasn't on the market yet. Well all that changed, and we have to get ready to start up an engine soon. (1 year ago) Watch Now
Image of Transform Your Foxbody with a Solenoid and Wire Tuck! April 7th
Starter Relay - Foxbody Restomod Part 87 - Finally getting the new starter solenoid installed in the fender area on some nut-serts/rivnuts. Also re-painting the door one more time after the last time was such a huge failure. (1 year ago) Watch Now
Image of Why This Foxbody is Getting a Battery Upgrade March 17th
Installing the Battery - Foxbody Restomod Part 86 - Yes, this is a full video on just installing a battery into the resto-mod mustang. Look, I know this is a super simple thing, but this car hasn't had a battery installed in over 20 years! It's a big deal to me. But, it's not just the battery, I also ended up installing a bus bar near the front of the car and securing the battery cables with some really nice rubber clamps. Technically both the positive and negative ends of the battery have been completely and properly terminated! (1 year ago) Watch Now
Image of How to Wire Your Coyote Swap Fuel Pump (and why it matters) February 25th
Fuel Pump Wiring - Foxbody Restomod Part 85 - Wiring up the Aeromotive fuel pump kit in my fox body restomod project but I'll probably have to adjust either the mounting location or the hardware I used at some point. You can also see the miserable job I did with the seam sealer on the door. And finally I tried putting down some SEM trim black just to see what would happen and it had a reaction with some of the other paint that was on the door. (1 year ago) Watch Now
Image of Why You Need a Battery Disconnect for Your Foxbody February 11th
Battery Disconnect Install - Foxbody Restomod Part 84 - Connecting the battery disconnect and prepping for the megagigawatts - It's the middle of the winter here in the north-east US but somehow the weather was beautiful, around 60F. I was able to push the fox body out of the garage and work on the electrical system. Installed the Flaming River FR1003-2 big switch and lever kit (not sponsored). Ran into some questionable things though, can you help me out? (1 year ago) Watch Now
Image of Why I’m Removing My Window Tint January 21st
Removing Window Tint and Sealing Seams - Foxbody Restomod Part 83 - Back on the Mustang project today, we're trying to seam seal the door and remove the tint before the window goes back in. (1 year ago) Watch Now
2023
Image of The Moment Has Come: Replacing the Dash Harness! November 20th
Reinstalling the Dash Harness - Foxbody Restomod Part 82 - I can't believe how far this restoration has come. Finally putting the restored dash harness back into the car. This is the first step towards getting the car re-energized. I also put some more sound deadener in under the roof and on the wheel wells. (2 years ago) Watch Now
Image of Is This Rusty Hatch Worth the Risk to Save? November 12th
More Rust Conversion - Foxbody Restomod Part 81 - Decided to take a break from working on the doors and instead start tackling some last minute rust conversion before the winter really hits hard. I also cleaned up the ceiling and inside wheel wells to get ready for sound deadening. Everything was going OK until I decided to rip the band-aid off and finally look at that hatch rust. After a quick wire wheeling, the results were very upsetting. (2 years ago) Watch Now
Image of Epic Guide to Installing the Foxbody Heater Box Assembly! October 16th
Heater Box Reinstallation - Foxbody Restomod Part 80 - It's been over a year since I rebuilt the heater box assembly in my foxbody Mustang but now that the firewall is completed, we can reinstall it. But first I have to make sure the blower motor works. And of course, yes there is a bit of work on the driver's side door thrown in as well, but this isn't a door window! (2 years ago) Watch Now
Image of Unhinged Restoration: Reviving the Doors October 9th
Doors Part 4 - Foxbody Restomod Part 79 - In this super quick video, I removed the passenger door hinges, and sand blasted the driver's side hinges. I also vacuumed out the door and sprayed a little more rust reformer inside of it to prepare it for primer. (2 years ago) Watch Now
Image of My Driver's Side Door vs. Rust: The Epic Battle! October 1st
Doors Part 3 - Foxbody Restomod Part 78 - Rust encapsulating my driver's side door - In this video I cleaned up the legendary rust on the window frames and sprayed rust encapsulating on the door itself. (2 years ago) Watch Now
Image of Tech Debt: The Invisible Cost of Your Vehicle Restoration September 25th
Paying Tech Debt Part 1 - Foxbody Restomod Part 77 - Did we just hire a new garage employee? - It's raining and it's going to be for a few days so in this video I'm finally getting back around to some stuff I put aside. (2 years ago) Watch Now
Image of Epic Dent Removal: 25+ Years in the Making! Avoid This Body Work Fail! September 17th
Doors Part 2 - Foxbody Restomod Part 76 - Hammering out a 25+ year old dent. Autobody folks, please look away... - Continuing the driver's side door restoration. Removing the latch, hinges, pushing out a dent that's been there for at least 25 years, and starting to remove rust. There are a lot better ways to remove dents than this. (2 years ago) Watch Now
Image of Reviving a Classic: Disassembling Fox Body Mustang Doors September 11th
Doors Part 1 - Foxbody Restomod Part 75 - Taking apart the fox body mustang doors for restoration - In this video we first check out the bumper support from last week, then start taking apart the driver's side door to prep it for paint. Getting the glass out and removing the original run channel molding was certainly a learning experience. (2 years ago) Watch Now
Image of Revive Your Bumper Supports with Sand Blasting and Cold Blue Sorcery! September 3rd
Original Parts Restoration Part 2 - Foxbody Restomod Part 74 - Sand blasting and painting bumper supports and cold blue on the hardware - Decided to start tackling some of the backlog of parts I have to get sand blasted and painted. The front bumper supports were really grimy though so I fired up my new parts washer for the first time and it really impressed. I only managed to get one out of two of the bumper supports done but all of the hardware was cold blued. I spent a lot of time in the garage today and I didn't get a lot done. But what I did do looks pretty good! (2 years ago) Watch Now
Image of Was The Pain Worth It? Sound Deadening My Restomod is Almost Done August 28th
Sound Deadening Install Part 2 - Foxbody Restomod Part 73 - Ouch! Sound deadening on the foxbody is almost done... (so sharp!) - Between the fine edge of the sound deadening, razor blades, and a super sharp battery box it's really a wonder that I didn't get worse cuts than I did. But we're pretty much done with the install I think. (2 years ago) Watch Now
Image of How to Relocate Your Battery in a Foxbody (and why you should) August 21st
Battery Relocation Kit Install - Foxbody Restomod Part 72 - This battery relocation kit is too sharp! - I installed a UPR battery relocation kit in my fox body restomod project car. My thoughts on the kit are below. I screwed up quite a bit but we manage to get it done in one video. (2 years ago) Watch Now
Image of Is Sound Deadening Your Restoration Project Worth It? August 13th
Sound Deadening Install Part 1 - Foxbody Restomod Part 71 - This sound deadening mat is sharp! - In this episode, we're installing the Siless sound deadening butyl mats in my fox body restomod mustang GT. This wasn't difficult to do but takes a really long time and I didn't get it done. So there will be a part 2 where we wrap it all up. (2 years ago) Watch Now
Image of Why This Manual Transmission Hump Kit Is Worth It August 6th
Manual Transmission Hump Kit Install - Foxbody Restomod Part 70 - Installing the hump and busting an air line! In this video I installed the LMR item LRS-7277A-K "1979-93 Mustang Manual Transmission Hump Kit". But first I had to get my other Mustangs ready for state inspections. One of my favorite air lines burst too. (2 years ago) Watch Now
Image of We Restored the Floor Pans on a Foxbody Mustang (and it’s WEIRD) July 30th
Floor Pan Restoration Part 2 - Foxbody Restomod Part 69 - (nice!) This is a milestone video. Let's take a quick look back over the project and see what we're up to. I also painted the floorpan with POR-15 rust encapsulator to get it ready for sound deadening and took a ride in my father-in-law's all original 1971 Hemi charger. (2 years ago) Watch Now
Image of Foxbody Floor Pan Restoration: Saving Your Ride from the Rusty Grave July 16th
Floor Pan Restoration Part 1 - Foxbody Restomod Part 68 - Wire wheeling the entire floor pan of my fox body restomod - I once again did a massive wire wheeling job on the restomod foxbody project. Using the wire wheel I removed the remaining crud, excess factory seam sealer, surface rust and exposed some deeper rust so that I can encapsulate it. This really put the grinder through its paces. (2 years ago) Watch Now
Image of Unlocking Performance: My Fox Body Brake Line Upgrade! July 10th
Brake Hard-line Install Part 4 - Foxbody Restomod Part 67 - Finishing up the hydroboost hard-line plumbing and NEW MERCH! - Finally finishing up the brake hard line installation with the Maximum Motorsports hydroboost swap tubes. I ended up also putting some other parts on the car like a brand new Motorcraft gas cap, the cleaned up door brackets, and the temporary steering wheel hub. Work got cut short due to a power outage though. (2 years ago) Watch Now
Image of Steering Shaft Installation for the Foxbody (How To) July 3rd
Steering Shaft Install - Foxbody Restomod Part 66 - In this video I installed the Maximum Motorsports Foxbody Steering Shaft for SN-95 Steering Rack swapped vehicles. Had a bit of trouble with it but we get there in the end. With that done, we reinstalled the factory rear swaybar and reached a massive milestone. The car is OFF jackstands (temporarily) and we pushed her out of the garage. (2 years ago) Watch Now
Image of Reviving My Foxbody Mustang with Original Parts! June 25th
Original Parts Restoration Part 1 - Foxbody Restomod Part 65 - Media blasting and painting some rusty original parts for the fox body - In this video, we fire up the new media blasting cabinet, do a couple of mods to it and start cleaning off some parts. We added an extra air nozzle into the cabinet along with a new media blasting thingy. My wife helps out with the sandblasting and painting. (2 years ago) Watch Now
Image of Why This Foxbody Firewall Restoration is Worth It May 28th
Firewall Restoration Part 4 - Foxbody Restomod Part 64 - Putting the brakes on this project - In this video, we reinstall the firewall insulation, brake and clutch pedal assembly, the hydroboost brake booster and master cylinder, and finally the steering shaft. The reinstallation is starting to heat up, the only thing slowing us down is the crushing weight of unfinished hardware. (2 years ago) Watch Now
Image of Coyote Swap Fuel System Installation: The Explosive Conclusion! May 21st
Fuel System Installation Part 4 - Foxbody Restomod Part 63 - The EXPLOSIVE conclusion of my fuel system installation... - In this video I finished installing the gas tank, braided steel AN6 fuel lines, and Aeromotive fuel pressure regulator. It's been over two years and I still don't know how to make a YouTube video that gets views but I'm super grateful for you watching! (2 years ago) Watch Now
Image of Coyote Swap Fuel System Install: The Ultimate Breakdown! May 14th
Fuel System Install Part 3 - Foxbody Restomod Part 62 - It's almost done! But did I ruin this fuel tank cover? - We're reinstalling the freshly restored fuel filler neck assembly, wiring up the fuel pump, "restoring" the fuel tank shield, routing the fuel lines, and sealing all the threads as we go. (2 years ago) Watch Now
Image of Coyote Swap Fuel System Install: Getting Started May 7th
I purchased the SVE coyote swap fuel system kit from LMR and started installing some parts of it. There's a quick explainer about AN fittings and how the fuel system works. Finally, my wife helps me paint some parts of the filler neck assembly and we attempt to pew pew blue the hardware. (2 years ago) Watch Now
Image of Coyote Swap Fuel System Install: Revving Up the New Tank! April 30th
Fuel System Install Part 1 - Foxbody Restomod Part 60 - Restoring the Fuel Filler Assembly and Prepping the Gas Tank on my Fox Body Restomod - Wow episode sixty! We're getting the gas tank ready to go in. A gas tank is useless without a filler neck, and you can't easily find all those parts so I've started restoring them. I think I've ordered all the parts I need minus one which is back ordered, we'll reveal next week. (2 years ago) Watch Now
Image of Revamp Your Ride: Fox Body Anti-Moan Braces \u0026 Parking Brake Cable Install! April 23rd
Brake Hard-line Install Part 3 - Foxbody Restomod Part 59 - Installing fox body anti-moan braces and parking brake cables - I got the replacement axle hard lines from LMR, these are the stock replacement ones that expect you to have drum brakes. They work with the foxbodybrakes.com rear cobra conversion kit I bought. After installing those, I also installed the LMR anti-moan braces and finished the rear brake install with new foxbodybrakes.com parking brake cables. (2 years ago) Watch Now
Image of Foxbody Rear Disc Conversion: Brake Pads and Lines April 16th
Brake Hard-line Install Part 2 - Foxbody Restomod Part 58 - Finally putting the brake pads and brake lines in on my cobra rear disc brake conversion on my fox body Mustang restomod. I also jury rigged the rear brake bracket to the upper control arm brace. A couple of channel announcements as well. (2 years ago) Watch Now
Image of Painting My Foxbody Mustang's Firewall With a BRUSH! 🤢 April 2nd
Firewall Restoration Part 3 - Foxbody Restomod Part 57 - Painting the firewall of my fox body mustang with a BRUSH 🤢 - So I finally got around to patching that extra hole I made in the floor pan. It's not pretty. But I also seam sealed and painted the whole thing with POR-15. With a brush... Not entirely sure if I like how it came out. It also made a massive mess because I didn't mask the holes. But I didn't mask them because the edges of the holes are dimpled in in such a way that I don't think it would have helped much. (2 years ago) Watch Now
Image of Foxbody Brake Hard-Line Installation: Everything You Need To Know March 27th
Brake Hard-line Install Part 1 - Foxbody Restomod Part 56 - New proportioning valve and brake lines for my fox body mustang - Now that we have the gutted brake distribution block complete, we can put it back together, install it and start installing the brake hard lines. I have to route them under my subframe connector so I ended up adding a union. I tried to do some brake line flaring but I'm absolutely certain I screwed it up. I also installed a motorsport proportioning valve but I have to cut the lines again and shorten them. (2 years ago) Watch Now
Image of Revamping My Fox Body Brake Distribution Block and Prepping Hard-Lines for Epic Install! March 20th
Brake Hard-line Install Prep - Foxbody Restomod Part 55 - Gutting my fox body brake distribution block and prep the hard-lines for install - In this video we gut the stock fox body brake distribution block and prep the intermediate hard-lines for installation. I also put the hardware back on the rear sway bar and the steering column. (2 years ago) Watch Now
Image of Firewall Makeover: Ditching the Gunk and Prepping for a Fresh Coat! March 13th
Firewall Restoration Part 2 - Foxbody Restomod Part 54 - Removing rust and old seam sealer, preparing to paint the firewall - In this video we start cleaning up the rusty firewall but there's a few parts I also started to clean-up as well first. We have a plan and I'm sticking to it! (2 years ago) Watch Now
Image of Underbody Restoration: The Grand Finale with an Epic Undercoat! February 27th
Underbody Restoration Part 9 - Foxbody Restomod Part 53 - Rubberized undercoating fumes can make you lightheaded - Yes, this is the last underbody restoration video I will be doing! I wasn't sure what I was going to do in this video at first but the weather changed. So in this video I'm spraying in the rest of the underbody with Eastwood rubberized undercoating. We ended up using 1 full can and about 1/2 of another can of Eastwood Rubberized Undercoating. (2 years ago) Watch Now
Image of Underbody Restoration: Parts Resto and Cleanup February 13th
Underbody Restoration Part 7 - Foxbody Restomod Part 51 - In this video we continue where we left off in the last one. Replacing the wire wheel, cleaning and painting some parts, and getting back underneath it to work on the underneath again. We're getting really close to finishing this part and I really can't wait until it's done. (2 years ago) Watch Now
Image of Underbody Restoration: This Build is Cursed! February 5th
Underbody Restoration Part 6 - Foxbody Restomod Part 50 - Finally used it up doing underbody restoration on my fox body - Wooo, episode 50! In this cursed episode I first did a super quick and dirty alignment to get the toe set on my 1989 Ford Mustang GT restomod project. After that I attempted to clean up the underbody a bit. I successfully installed the Steed clutch quadrant on my pedal bracket. Then I tried to install some door hinge pins, and finally I failed at removing a stuck bolt from one of the door anchor pads. Every now and then you have one of those days, but I'm just grateful to be back in the garage after a brief hiatus. (2 years ago) Watch Now
Image of Foxbody Restomod: The Ultimate Rear Suspension Reveal! January 23rd
Finishing the Rear Suspension - Foxbody Restomod Part 49 - Finishing the Rear Suspension and Assembling my Hydroboost - In this video I re-assembled the hydroboost with a new master cylinder and took another shot at installing the upper torque box reinforcement brace. I have to modify the rear brake body mount but I think it's easier to modify than the cross bar. (2 years ago) Watch Now
Image of How to Patch a Floor Pan - Foxbody Tech Tips January 16th
Patching the Floor Pan - Foxbody Restomod Part 48 - Patching floor pan rust in my fox body Mustang restomod - It's finally time to patch that one rust hole we found in the floor pan. This is definitely outside my comfort zone and I think the final result isn't ideal but not bad for my skill level. (2 years ago) Watch Now
Image of Revamping My Foxbody: Why I'm Ditching the Insulation! January 1st
Removing NVH Insulation and Restoring Parts - Foxbody Restomod Part 47 - Prepping my hydroboost for install and removing the factory sound deadener in my Mustang Restomod - I restored some of the rusty parts for the fox body restomod project. This included the hydroboost unit, the rear bumper crash attenuators, and the fuel tank straps. I also got some dry ice from a flash frozen steak delivery service so I wanted to give a try using it to peel the remaining factory NVH insulation off. (2 years ago) Watch Now
2022
Image of Reinstalling the Revamped Rear Axle in My Epic Restomod Foxbody December 11th
Rear Axle Install Part 2 - Foxbody Restomod Part 46 - My rebuilt Ford 8.8 rear differential gets installed back into the car. Then we installed the rest of the rear suspension, the foxbodybrakes.com rear cobra brake kit, and those gorgeous 18x10 SVE NVX rear rims with 285/35/18 sumitomo rubber. This took me all year to rebuild and I'm sooooo pumped to have it done and installed! (2 years ago) Watch Now
Image of Why Your Foxbody Needs a 5-Lug Rear Axle Upgrade November 27th
Rear Axle Install Part 1 - Foxbody Restomod Part 45 - Finally, putting my rebuilt Ford 8.8 rear differential back into the car. Also got some new parts to install and finally got to use my nut-sert tool but I ran into even more problems with the cross bar on the upper control arm reinforcement brackets. We're really close to getting the axle back in the car though. As a refresher on the rear axle we did five lug swap 31-spline yukon axles, cobra limited slip differential, 3.73 yukon gears, custom electro-etched diff cover, foxbodybrakes.com rear disc cobra brake conversion and welded tubes. (3 years ago) Watch Now
Image of How Upper Torque Box Reinforcement Saved My Mustang November 21st
Upper Torque Box Reinforcement Part 2 - Foxbody Restomod Part 44 - Completing the BMR Upper Torque Box Reinforcement Install on my Foxbody Mustang - I bought a bunch of stuff for the garage and finished up installing the BMR upper torque box reinforcements. (3 years ago) Watch Now
Image of Discover the Jaw-Dropping Foxbody Restomod Wheels! November 7th
Upper Torque Box Reinforcement Part 1 - Foxbody Restomod Part 43 - New Rims! and starting the upper torque box reinforcement - Found the exact rims I wanted for the project car on facebook marketplace and jumped on it. The seller took amazing care of them. The tires are barely used and the finish on the rims is perfect. (3 years ago) Watch Now
Image of Find Out Why This Firewall Restoration is a Must-Do! October 17th
Firewall Restoration Part 1 - Foxbody Restomod Part 42 - Fixing Some Loose Ends When Tragedy Strikes! - Some of my new parts and tools arrived so I started going back over some of the loose ends I left behind. Including the brake dust shields and the steering rack bellow clamps. Also organized and cleaned my workbench a bit. Then, I tried starting the firewall restoration and things took a terrible turn... (3 years ago) Watch Now
Image of The Best Brake Upgrade for Your Foxbody October 10th
Cobra Brake Install - Foxbody Restomod Part 41 - I started off this video not having much time so I thought I'd just clean some parts up and get the rear axle closer to installation. So I painted the rear springs but then ended up installing the front Cobra brake kit from foxbodybrakes.com instead. Unfortunately it turned out that the 2003 Mustang 16" rims I had lying around will not fit, so I'm going to have to figure out what to do about that. Things get super frustrating but we plow through! (3 years ago) Watch Now
Image of This Underbody Restoration Will Change Everything October 3rd
Underbody Restoration Part 5 - Foxbody Restomod Part 40 - Swapping Fox Mustang Tie Rods, Painting Upper Torque Box Area, and more - Got a ton of work done over the weekend on my 1989 Ford Mustang GT hatchback restomod project. In this video I painted the southside machine lift bars with a "hammer" finish paint. I also swapped the SN95 inner and outer tie rods out for foxbody Mustang inner and outer tie rods. I cleaned up the upper torque box area under the car and gave it a nice coat of rust reformer. I also sprayed the wheel wells in with Eastwood rubberized undercoating. Then I installed some new bushings in the brake pedal to fix the one I smashed in the last video. Finally, I started cleaning up the rear springs I will be re-using. (3 years ago) Watch Now
Image of Foxbody Pedal Assembly Restoration: A Must for Your Mustang! September 19th
Pedal Assembly Restoration Part 2 - Foxbody Restomod Part 39 - Completing Restored Pedal Box for Foxbody Mustang - In this video I put a final coat of paint on the brake pedal assembly parts and setup a new paint hanger I purchased from Amazon. I also installed the Maximum Motorsports hydroboost conversion kit brake pedal. (3 years ago) Watch Now
Image of How to Restore Your Foxbody's Pedal Assembly (and WHY you should) September 12th
Pedal Assembly Restoration Part 1 - Foxbody Restomod Part 38 - Foxbody Pedal Assembly Restoration and Hydroboost Conversion - In this video I took apart the brake pedal box in preparation for the hydroboost conversion and the rust made me super sad. So I started restoration on the rusty bits and ended up putting a few coats of rust reformer on it. I did not finish the restoration in this video but it should be complete by the second part. (3 years ago) Watch Now
Image of The Secret to a Perfect Foxbody Restoration (Underbody Restoration) September 6th
Underbody Restoration Part 4 - Foxbody Restomod Part 37 - Foxbody Mustang Rear Axle Prep and Wheel Well Cleanup - In this video I'm focusing on getting to where I can reinstall that beautiful Ford 8.8 axle we built. I still have some underbody restoration to do and some more parts need to be put on the axle itself. So that's what we take care of here. Removing the old undercoating from the driver's side wheel well and treating all the metal with rust encapsulator. Then installing upper control arm bushings into the 8.8 axle housing, torquing the awesome custom-branded differential cover down, installing new rear axle brake lines, and a brand new diff vent. (3 years ago) Watch Now
Image of How to Upgrade Your Foxbody's Front Suspension August 29th
Front Suspension Install Part 2 - Foxbody Restomod Part 36 - Installing Foxbody Mustang UPR Coil Over Kit and Tubular Control Arms - In this video we install the UPR coil over kit with Koni non-adjustable orange struts along with the new tubular a-arms and the SN-95 steering rack. (3 years ago) Watch Now
Image of Front Suspension Install Part 1 - Foxbody Restomod Part 35 August 22nd
Foxbody Mustang UPR K-Member Install - Finally starting the installation of the front suspension! In this video I installed the UPR tubular K-member and the SVE caster camber plates. I also prepped both coilovers for installation. (3 years ago) Watch Now
Image of Painting the Engine Bay - Foxbody Restomod Part 34 August 15th
I painted the engine bay and the front wheel wells with white enamel paint in my home garage. I setup a quick paint booth on this side of the garage by stapling painters drop cloths to the ceiling and to some boxes across the floor. (3 years ago) Watch Now
Image of Odd Jobs - Foxbody Restomod Part 33 August 8th
Just doing some random tasks here and there to get ready for engine bay paint and trying to put together my coil over kit. Not a lot of progress but some stuff that needed to get done. (3 years ago) Watch Now
Image of Engine Bay Prep Part 3 - Foxbody Restomod Part 32 August 1st
In this video I cut off the driver side sway bar bracket, prep and prime the frame rails, and remove the pedal box and steering wheel so I can mask off the engine bay for paint. (3 years ago) Watch Now
Image of Underbody Restoration Part 3 - Foxbody Restomod Part 31 July 25th
In this video I cut off most of one of the sway bar brackets and rust prep the passenger side rear wheel well of my 1989 Ford Mustang GT Foxbody that I'm restoring. This was in the middle of a heatwave so I couldn't get that much done and the work was a bit physically exhausting. (3 years ago) Watch Now
Image of Engine Bay Prep Part 2 - Foxbody Restomod Part 30 July 18th
Cleaning up the engine bay again. In this video I started drilling out the spot welds on the sway bar brackets, another coat of glazing putty on the strut towers, priming in the radiator support, and painting one of the inner fender wells. (3 years ago) Watch Now
Image of Underbody Restoration Part 2 - Foxbody Restomod Part 29 July 4th
Happy Fourth of July! More underbody and wheel well restoration. More sanding, wire wheeling, rust reformer, and general strife. This is another liminal video of grinding progress. I started working on the rear wheel well but instead went back to front and cleaned up the front wheel wells. (3 years ago) Watch Now
Image of Engine Bay Prep Part 1 - Foxbody Restomod Part 28 June 27th
My father came up to visit and I immediately put the poor man to work sanding my engine bay with me. lol it was a blast, and we had a great time! (3 years ago) Watch Now
Image of Underbody Restoration Part 1 - Foxbody Restomod Part 27 June 13th
Sanding and painting part of the underbody of the Mustang. There's quite a bit of rust, I'm using Rustoleum's Rust Reformer to encapsulate. (3 years ago) Watch Now
Image of Underbody Parts Removal and New Parts - Foxbody Restomod Part 26 May 23rd
In this video I removed a bunch of fuel/brake lines and some other stuff that will be in the way when I clean, sand, rust encapsulate, and paint/undercoat the bottom of the car. (3 years ago) Watch Now
Image of Rear Diff Rebuild Part 4 - Foxbody Restomod Part 25 April 18th
OMG, it's done! The rear axle is complete! Torquing the pinion nut is extremely difficult but I managed to get a reasonable result. We get a decent pattern on the gear mesh. We get good backlash measurement. We get this hell project complete. Trying on the foxbodybrakes.com rear disc conversion kit. Installing the 5 lug 31-spline axles. Putting on our custom "Sleazy" electro-etched diff cover. Ooooo it's a thing of beauty! (3 years ago) Watch Now
Image of Rear Diff Rebuild Part 3 - Foxbody Restomod Part 24 March 14th
Taking another beating trying to put this axle together. We get a bit further though, dialing in 8.8 Ford diff carrier shims, measuring backlash, and checking the gear mesh pattern. The new ring gear bolts finally came too so I install those as well. Unfortunately I was unable to properly install the crush sleeve so I'll have to wait for some help on that. (3 years ago) Watch Now
Image of Rear Diff Rebuild Part 2 - Foxbody Restomod Part 23 February 21st
This video is mostly just me fighting with the outer pinion bearing race. I noticed some galling/burrs in the seat so I needed some new tools. We get the new axle bearings installed along with new seals, created a pinion setup bearing, and pulled the new wheel studs into the new 31-spline axles. Incredible amount of work over multiple days for not really a lot of progress, but we get there in the end. (3 years ago) Watch Now
Image of Rear Diff Rebuild Part 1 - Foxbody Restomod Part 22 January 31st
Starting to put it all together now. In this video I assemble the carrier with new bearings and a new ring gear. My dinky harbor freight vice is not big enough and I ended up ripping it off my workbench. (3 years ago) Watch Now
2021
Image of Rear Axle Clean-up Part 3 - Foxbody Restomod Part 21 December 13th
OK, I lied, there's one more video for cleaning up the rear axle. I ordered some new tools so I was able to remove the axle bearings and I was able to get the pinion bearing races driven out. Followed up with a thorough interior blasting of bra-kleen. (3 years ago) Watch Now
Image of Rear Axle Clean-up Part 2 - Foxbody Restomod Part 20 November 15th
Finishing up the clean-up of the rear axle housing. Hitting it with the wire wheel, stripping disc, welding the axle tubes in (poorly), rust encapsulation, and paint. Also includes a sneak peek of the new internals. (4 years ago) Watch Now
Image of Rear Axle Clean-up Part 1 - Foxbody Restomod Part 19 October 11th
In this video, I'm using the maximum motorsports tool to remove the bushings, removing the seals, and attempting to remove the bearings from the 8.8" Ford rear axle. I also begin the process of removing the rust so that I can eventually spray it with a rust prohibitive coating. (4 years ago) Watch Now
Image of Rear Axle Teardown - Foxbody Restomod Part 18 September 17th
Taking apart the 8.8" rear axle from my 1989 Mustang GT. All was going well until I hit a stuck differential center pin that turned out to be a broken bolt. It took forever to get it out but with a little help we were able to smash it out. (4 years ago) Watch Now
Image of Lower Torque Box Reinforcement - Foxbody Restomod Part 17 September 3rd
Installed some torque box reinforcement plates for the lower control arms. I realized I was missing the upper control arm plates so those will have to wait for another video. Once again, it was great having my father-in-law's help on this one! I'm going to have to take these back out to spray anti-rust and prep it for welding at some point but for now this is fine. (4 years ago) Watch Now
Image of Interior Harness Removal - Foxbody Restomod Part 16 August 13th
Another short video this week, I had an hour to spend removing wiring harnesses from the inside of the car. I removed the main body harness all the way back to the tail lights and freed up the hatch harness. Also removed the overhead harness that connects the dome and map light. (4 years ago) Watch Now
Image of K-member Removal - Foxbody Restomod Part 15 August 6th
In this video, I drop the k-member from my 1989 Mustang GT and remove some other things. Short video today, one of my dogs is recovering from TPLO surgery so I haven't had much time to get in the garage. (4 years ago) Watch Now
Image of Front Suspension Removal - Foxbody Restomod Part 14 June 28th
In this video, I remove the front suspension from my 1989 Mustang GT. The intent is to replace it with a tubular K-member with coil overs, SN95 spindles (5 lug hubs), and better brakes. (4 years ago) Watch Now
Image of Rear Axle Removal (Part 2) - Foxbody Restomod Part 13 June 21st
Finishing up the removal of the Ford 8.8" 3.73 rear axle. I forgot how awful drum brakes are. The parking brake cable is annoying. (4 years ago) Watch Now
Image of Rear Axle Removal (Part One) - Foxbody Restomod Part 12 June 14th
Part one of dropping the rear Ford 8.8 axle from my mustang. Uncovered some surprises! Something about jacking a car up onto four jack stands always slightly terrifies me. (4 years ago) Watch Now
Image of Heater Box Restoration (Part B) - Foxbody Restomod Part 11 May 17th
This the second part of the heater box restoration. In this video I gave the rusty bits a quick rust converter spray, test the heater core and evaporator core for leaks, plastic weld a big cracked corner together, took apart and scrubbed the fan box, and finally glued the heater box together with the new evaporator core in inside. Then we put the thing back together, finish painting some stuff, and put it in storage. (4 years ago) Watch Now
Image of Heater Box Restoration (Part A) - Foxbody Restomod Part 10 May 10th
This is the worst thing I ever had to do for this Mustang (so far). I got a replacement heater box used from Ebay and I decided to split it in two to replace the evaporator core. It involved a heat gun, screwdrivers, a deadblow hammer, and way more force than I was comfortable applying to 30 year old plastic. Never again, lol! (4 years ago) Watch Now
Image of Strut Tower Smoothing - Foxbody Mustang Restomod Part 9 May 3rd
In this video I'm welding up all the holes in the strut towers to prepare the entire engine bay for smoothing. I ended up cutting out small plugs to fill the larger holes. This will likely be "part 1" of this section of the engine bay because I didn't do the back sides of the strut tower or the side facing the firewall. (4 years ago) Watch Now
Image of Wiring Harnesses - Foxbody Mustang Restomod Part 8 April 19th
The wiring harnesses are removed, cleaned up, re-taped and put to the side. Where necessary new wiring harnesses are spliced in and wires are inspected for splits and corrosion. (4 years ago) Watch Now
Image of Dashboard Restoration - Foxbody Mustang Restomod Part 7 April 12th
In this video I did a restoration and re-dye of my stock 1989 Mustang GT dashboard. There were some gauges installed by the previous owner which left some screw holes. It was pretty moldy in some spots. (4 years ago) Watch Now
Image of Rust and Other Disassembly - Foxbody Mustang Restomod Part 6 April 5th
Removing the quarter glass and doors, fixed a cracked seat stud, cleaning, and finally rust remediation on the door hinges, floor pans, radiator support, and fenders. (4 years ago) Watch Now
Image of Backside Tear Down - Foxbody Mustang Restomod Part 5 March 29th
In this video, I remove the rear taillights, the rear bumper, harvest the lights, and start to tackle some of the rust. (4 years ago) Watch Now
Image of Smooth Fender Aprons - Foxbody Mustang Restomod Part 4 March 22nd
In this video I tackle replacing the stock factory fender aprons that are full of holes with LMR's smooth fender aprons (with mixed results). This was a huge learning experience for me as I've never really removed and replace sheetmetal panels before. (4 years ago) Watch Now
Image of Face/off - Foxbody Restomod Part 3 March 15th
Finally able to start taking apart my car shaped object. I started with the front body work, trim, molding, etc. (4 years ago) Watch Now
Image of Interior Removal - Foxbody Restomod Part 2 March 8th
With less mold, I'm able to finish removing the interior, hose it out and push the shell into the garage. (4 years ago) Watch Now
Image of Mold - Foxbody Restomod Part 1 March 5th
This is my 1989 Mustang GT from high school. It's been sitting in my parents garage for about 18 years. Will it start? NO! It has no engine. (4 years ago) Watch Now
2019
project
July 30th
Restoration Begins
The actual restoration started almost a year before I released any videos. (6 years ago)
expense
July 27th
Towed to My House
It's been almost 20 years sitting in my parents garage. Parted out. Covered in stuff. I'm a geezer now but I had some spare cash and a yen to right some past wrongs and relive the thrill of driving my high school heart-car. She's moldy and filled with trash, but the journey begins. "Hey I should film this for documentation purposes..." I think to myself. (6 years ago)
2001
problem
July 4th
Blown Headgasket
On the Fourth of July in 2000-ish, during some spirited burnouts, we heard a loud pop. I knew immediately that the head gasket had blown. I drove it home and parked it in the garage for what I had no idea would be the last time. I parted out the engine and sold as much as I could. (24 years ago)
2000
project
March 20th
The Waterpump Incident
About a year and a half into owning the car, the water pump started to leak coolant. I thought, "what a great way to learn about cars!" and naturally ended up pulling the engine, gasket matching the intake to some new Edelbrock Performer RPM heads and dropped in a motorsport letter cam. Oh yeah and replaced the water pump too. The car woke up after that and was generally a ton of fun. I'd later take it to the track and achieve a mid 12. While this was fast for its time, it really does pale in comparison to todays vehicles. (25 years ago)
1999
project
February 22nd
Converted to 5-Speed
After blowing up three AODs, I had had enough. My friend who was really in to Mustangs as well convinced me to convert it to a 5-speed manual. I'd later replace the manual transmission about 4 or 5 times but it really made the car super fun to drive. (26 years ago)
1998
expense
March 13th
Car Purchased
As a senior in High School I purchased the car taking a loan from Mom & Pops Savings. It replaced my 79 Mustang LX coupe with a 200 CI inline six. I wish I held on to the 79 as well but I couldn't have both. It was originally a 302 with an AOD automatic transmission. When it became mine it had already had some modifications from previous owners, including a GT-40 intake, lowering springs (in the rear only lol), equal length shorty headers, Flowmaster exhaust, underdrive pullies, and a cold air intake. It had decent power for the time. It felt and sounded great. (27 years ago)